I discovered I love muesli. I didn't know what it was until I stayed at the Bed & Breakfast that served it. I tried it and loved it, and each year when we go back I would look forward to it. Even then I didn't know what it was called, I just knew I liked it. I finally asked and so now when I see it in cookbooks and magazine I know what they are talking about.
Since I am trying to amp up the nutrition in my food I thought I would put one together that had all the stuff in it that I like. There are lots of different toppings you can add, just a pick a couple or several you like.
This is going to give you energy and it will stay with you until lunch.
Ingredients:
1 green apple, cored and diced small
1 cup rolled oats or kamut
Goji berries, small handful
3 tbsp ground flax seed
3/4 cup coconut milk
3/4 cup water
1 cup of low fat Greek yogurt
3 tbsp honey, agave, or stevia
1/2 tsp cinnamon
pinch salt
Mix together and refrigerate until cold. When ready to eat take out a serving to a separate bowl and add desired toppings. I like cinnamon, granola and nuts. I make this at the beginning of the week and it is ready for quick weekday morning meals.
Toppings:
Walnuts, diced
Almonds, diced
Granola
Coconut
Dried cranberries
Raisins
Pepita's ( pumpkin seeds)
Fresh berries
Banana
Your going to love it and need to make another bowl full for next week!
Wednesday, December 21, 2011
Friday, December 16, 2011
Roasted Cauliflower with Asiago

If you gotta eat cauliflower, this is the way to eat it!
Let me say right off, that cauliflower is not very photogenic. I apologize for this picture upfront, but hope you get the idea of what it is supposed to look like.
While I tend to be a pretty healthy eater I will admit that cruciferous vegetables are not my favorites. Broccoli and cauliflower are hardly ever on my menu because I do not care for them, but my husband loves them both and so occasionally I will make them for dinner. And you can forget about brussel sprouts, I hate them! Can't get them into my mouth. So when I figured out how to make cauliflower by roasting it in the oven and then putting cheese on it, I thought, now that's more like it! This I can eat. It's actually pretty good.
So here's how to make it. Preheat your oven to 400 degrees. Get one large head of cauliflower and break it up into medium size florets. Put it into a large bowl and add some olive oil, seasoned salt, pepper, and toss to coat well. Put this on a sheet pan, add about 1/4 cup of water to pan and put into the oven for about 20 minutes. The water will help with streaming. Check the cauliflower for doneness by taking a paring knife and inserting it into the thickest part of the vegetable. If done, remove from the oven, and sprinkle with about 1/4 cup finely grated asiago cheese and salt if necessary. Serve hot.
Dig in! While you are eating, think about how many vitamins you are giving to your body. It will make you feel strong just thinking about it.
Thursday, December 8, 2011
Caramelized Rice Pudding

There is something about rice pudding. It evokes time gone by. I think of my childhood, and my daughter's childhood. She looooooved rice pudding! It's comfort food. While everyone has their preferred recipe, it is basically white rice in milk with sugar.
I remember hoping there would be rice leftover from dinner so I could have it for dessert. I didn't even bother to make the rice pudding, I just put in a bowl, nuked it, added some milk, sugar and cinnamon and ate it just like that. And I was happy to have it.
These days I am a little more picky and I enjoy the finer things in life so I actually take the time to make it. I've tried various recipes and I liked the caramelized rice pudding for a little something extra . Yes it's that same old rice pudding recipe but then you put sugar on top and use a blowtorch to burn it. The result is a crunchy topping similar to creme brulee.
The recipe: Preheat the oven to 350 degrees.
Put 3 cups of whole milk into a medium saucepan. Add 1/2 cup arborio rice, and 1 vanilla bean that has been split and scraped. Cook, stirring occasionally, until the rice has absorbed most of the liquid. Discard the vanilla bean.
In a bowl whisk 3/4 cup of heavy cream with 1/4 cup sugar, a pinch of salt, 2 large egg yolks. Pour into the rice mixture stirring constantly and return to heat until it comes to a low simmer.
Divide mixture into four 6 ounce ramekins. Set them in a roasting pan and add boiling water halfway up sides. Bake until almost set about 15 minutes. Remove ramekins from pan and allow to cool 10 minutes. Sprinkle tops with raw sugar and a pinch of cinnamon. Using a kitchen torch caramelize the sugar.
If you do not want to use a vanilla bean substitute a good quality vanilla.
If you do not have a kitchen torch you can brown them under the broiler. But keep an eye on them as they can burn very quickly.
Friday, December 2, 2011
Holiday Cocktail

This recipe has the warm scent of mulling spices telling you the holidays have arrived. You can buy mulling spices in various forms, and use that, or you can make your own.
To make mulling spices: In a piece of cheesecloth combine 3 tbsp orange rind, 3 tbsp broken cinnamon sticks, 2 tbsp whole allspice, 2 tbsp whole cloves. Spoon into the center of the cheesecloth and tie up. Secure the end with a piece of kitchen twine.
In a large saucepan combine 2 cups of pomegranate juice, 2 cups cranberry juice, 1 cup freshly squeezed orange juice and mulling spice bundle. Heat to a low simmer, simmer for 5 minutes, turn off heat, and cover. Allow to cool completely. Allow mulling spices to steep for several hours or overnight.
Remove cheesecloth bundle. Strain through fine sieve into pitcher. Chill.
To serve, fill glass with ice, add 1/3 vodka, juice to almost full, and a splash of tonic or club soda.
Enjoy! Happy Holidays!
Monday, November 28, 2011
Fall Salad of Apple and Walnuts

No matter what time of year it is we need to eat salads with regularity. Most people enjoy salad during the hot summer months only but if you think about what is in season, and taylor your salad around those ingredients, you can create a seasonal salad.
This one has green apples, walnuts, and cheddar cheese in it. The apples are a nod to Fall. Using reduced apple juice and apple cider vinegar in the dressing also speak of fall. The minute you taste it you realize it even says Fall.
Ingredients:
1 cup apple juice
3 tbsp olive oil
2 tbsp apple cider vinegar
Salt and pepper
1/4 cup Walnuts
4 to 5 cups baby salad greens
1 green apple
1 oz chuck of cheddar cheese, cut into small cubes
Place apple juice in small saucepan and cook over medium heat until reduced to 3 tablespoons. Allow to cool.
Toast walnuts in a skillet over medium high heat. Move them around in the pan every few seconds to prevent burning. Toast until you smell them and they start to turn slightly brown. Cool. Chop coarsely.
Make the dressing by combining the reduced apple juice, olive oil, vinegar, salt and pepper. Whisk all in small bowl.
Core the apple then lay on side and slice thinly.
Assemble the salad by placing greens in a large bowl, add the walnuts and apple, and toss with dressing. (You may not need all the dressing.) Plate, then place cheese over top.
Serves 2
Tuesday, November 15, 2011
Quinoa Cereal
Quinoa.....breakfast of champions. You either love it, or you hate it.
 I've had a difficult time with quinoa. I want to like it, but I don't. I've tried several recipes for quinoa as an entree, or part of a meal, and I am never thrilled with the results. But I want to like it because it is so good for you. It is a grain that contains all the amino acids that make it a complete protein. That's hard to find and we should all be eating it on a regular basis to up our nutrient quotient.
The other day I was reading yet another cooking magazine and I saw, for the second time, a recipe for quinoa cereal for breakfast or as part of a brunch. I was curious about it, wondering if I might actually like it when made like oatmeal. I do love my oatmeal so I decided I would give it a try.
I was lucky because I picked a rainy day, when it's wet and cold outside and you don't want to leave the house, you just want comfort food and your jamies. The result was fantastic, and I loved it! Yes I said love! It is delicious, she says surprised. I feel so much better because now I know I can eat it with regularity and get the health benefits of it.
Ingredients:
1 1/2 cups milk
1/2 cup quinoa
2 tbsp maple syrup
1/4 tsp cinnamon
1/2 cup fresh berries
1 banana, sliced
Walnuts, small handful, chopped fine
Rinse the quinoa and drain. Heat the milk in a small saucepan, add the quinoa, bring to a boil then cover and reduce to a low simmer for about 15 minutes. Most of the milk will be gone, with just enough left to eat as cereal. Remove from the heat and add the rest of the ingredients. Eat straight away!
This recipe is so flexible you can add anything you want. Other items to add would be: almonds, pecans, dried cranberries, raisins, diced apple. Fresh fruit is great but you could also add frozen fruit. If you have issues with sugar use stevia, or another sweetner like agave.
You can also use any type of milk you like, from full fat to skim, or almond or soy milk. Use what you like. Of course the more fat in the milk the better the end product but if you shy away from full fat milk use whatever you have.
I hope you will give it try. You just might be surprised too.
This recipe serves 2.
Monday, November 14, 2011
Butternut Squash Soup

As usual, when Fall has arrived I start wanting soup. Lots of soup. I love it for dinner. It is warm and comforting and can be very nutritious.
I usually buy butternut squash soup but this year I decided to try and make my own. I looked at several recipes and then took what I liked and made up my own.
This recipe makes 8 servings which is a lot. The nice thing is that you can have it for a dinner party if you are having several people over as it is a great first course. Or simply keep it in the fridge for a few days for dinner and lunch. A cup for lunch with a grilled cheese sandwich is not bad. Doesn't that remind you of your childhood?
Ingredients:
2 tbsp coconut oil
2 celery ribs-diced small
2 carrots-diced small
1 medium onion-diced small
1/4 tsp cinnamon
3/4 pound potato-peeled and coarsely chopped
2 medium granny smith apples-peeled, cored, and coarsely chopped
1 1/2 pound butternut squash - peeled and coarsely chopped
2 cups chicken or vegetable broth
1 tsp salt
1/2 tsp white pepper
2 cups water
Optional garnishes: bacon bits, sour cream, green apple slices
Cook celery, carrot, onion in oil until softened but not brown.

Add cinnamon and stir for 1 minute.
Add squash, potato, apple, stock, water, salt, and pepper. Simmer, uncovered, until vegetables are tender, about 20 minutes.
Puree all in batches in blender.
Put back in pot to rewarm as needed.
If it is too thick simply add more stock or water.
Serve hot with desired garnish.
Sunday, October 16, 2011
Lentils, Rice and Caramelized onions
A vegetarian friend of mine sent me this recipe because she knew I was looking for vegetarian meals that have some protein in them. The original recipe came from Aarti Sequeira of the Food Network. I made a few minor changes as I always do to incorporate more of my preferences.
 This recipe provides good protein from lentils and I used brown rice for the whole grain carbohydrate. The caramelized onions are a special surprise that is used both in the body of the dish and as a garnish. This is a one pot meal, which I love, and it makes a good amount, so I had leftovers. We, 2 of us, ate this for dinner and I still had enough for lunch for several days. This recipe serves 6.
Ingredients:
1 cup brown lentils, rinsed and sorted
1/4 cup olive oil
1 tsp cumin seeds
1/2 tsp cracked black pepper
3 large red onions, thinly sliced
Salt
3/4 cup brown rice
1/2 tsp ground cumin
1/2 tsp cayenne pepper
1 cinnamon stick
Garnish: (all are optional)
2 tbsp pine nuts, toasted or any nuts you have available
Squeeze fresh lime juice
Greek yogurt
Cilantro
Put the lentils in a medium saucepan and cover with enough water by one inch. Bring to a boil, reduce to simmer and cook until lentils are tender but not mushy, about 20 minutes.
Meanwhile heat a large skillet, add the olive oil, then the cumin seeds and cracked pepper and cook for about 1 minute.
Add the onions, sprinkle with several pinches of salt, and cook on medium or low heat until they turn dark brown, stirring often. This will take 15 to 30 minutes to get good color on the onions. Do not rush this or they will burn.
Remove half the onions from the pan to use as garnish.
To the pan add the ground cumin, cayenne, and cinnamon stick and saute about one minute. Add the rice and cook until grains start to turn slightly brown, this should take only a few minutes. Add the cooked lentils and 3 cups of water, and 1 1/2 tsp of salt. Bring to a boil, then reduce the heat to a low simmer, cover and cook for 35 minutes. The water should be almost completely evaporated and the rice should be tender. Allow the rice to steam with the lid on for 10 minutes. Remove the cinnamon stick from the pan.

Meanwhile toast the nuts.
To serve: mound rice into bowl, hit with a squeeze of lime, top with the caramelized onions, a dollop of yogurt and a bit of chopped cilantro.
Thai Beef with Snow Peas

This dish is somewhat new for me. I don't usually gravitate towards Asian inspired dishes. My feeling is that I would rather have it out at a restaurant that does it well, and that trying to replicate it at home is not worth it. I feel that way about sushi too. I can get some good sushi at the sushi bar, so making it at home is not going to happen. However, this dish seemed relatively easy and the idea of the chile's intrigued me. In addition I have never cooked with coconut milk, thinking it sounded too sweet and coconut is something I would rather have in a dessert. But I decided to gave it a try. I was pleasantly surprised. It did not taste like dessert at all. The coconut milk gave the rice a a slightly tropical flavor which was delicious. My husband must have liked it because he said I could make it again. That's guy speak for..... I like it.
Ingredients:
1 1/4 cups brown jasmine rice
1 can (13.5 ounces) coconut milk
3/4 cup water
1/2 tsp salt
2 tbsp fish sauce
2 tbsp soy sauce
1 tsp sugar
1 tbsp coconut oil
1 1/4 pounds organic ground beef
3 garlic cloves, minced
3 long hot peppers, seeded and sliced into matchsticks
1 can straw mushrooms
1 handful fresh snow peas
1/2 cup coarsely chopped basil
1 lime, cut into four pieces
Start by making the rice. When the rice is almost done, work on the beef.
In a medium saucepan combine the rice, coconut milk, water and salt. Bring to a boil, then reduce the heat to low and cover. Cook about 20 to 25 minutes. The liquid should absorbed but not dry. Allow to sit for 10 minutes before serving.
In a small bowl combine the fish sauce, soy sauce, sugar and stir until the sugar is dissolved. Set aside.
Heat a skillet or wok, add the vegetable oil, then the beef. Saute until the beef is almost cooked through, working the beef into small pieces as it cooks. Add the garlic, cook for a few seconds, then add the chili's, the mushrooms, and snow peas. Cook until the snow peas are just starting to soften about 4 minutes. Add the soy sauce mixture, cook an additional one minute. Remove from heat.
To serve place the rice in a bowl, add the beef over top, and serve with one lime wedge.
Chili's: Chili's can taste very different. I have used red jalapenos that have very little heat at all, but Thai chili's are hot. You must really taste the chili while it is raw to determine how much you want in the dish. Your love or tolerance for the heat is really what determines how much chili should go in to the dish. You can also cook the dish with the chili's to get some of the flavor and then remove them prior to serving. You don't have to eat them. Also, I use rubber gloves when cleaning chili's to keep the heat off my hands. I have made the mistake of touching my face after chopping chili's only one time. It only takes once. After that, I have been consistent in using the gloves.
Herbs: The use of basil in this dish is traditional but I think using cilantro would also work well.
Makes 2 servings.
Tuesday, September 13, 2011
Roasted Peppers with olives and capers

Sometimes all we need is a simple recipe using good ingredients. This recipe is flavorful and can be eaten as a salad, or use it as a topping for crostini.
Use red, yellow and orange peppers.
Put some salt in some olive oil then brush the peppers with it. Place on a baking sheet and roast in a 400 degree oven for 20 to 30 minutes, turning over as needed. The skin needs to blister and start coming away from the meat. Remove from oven and allow to cool. Peel off the skins and cut into 1 inch wide long pieces. Place in a bowl. Do not rinse or you will lose much of the flavor.
You can also roast the peppers on the grill.
To the bowl add capers, strong black Italian olives chopped, chopped parsley, chopped anchovy, minced garlic, salt, and chili flakes (optional). Toss. Allow to sit for at least 30 minutes before eating but the longer this sits the more flavorful it is.
Enjoy!
Enjoy!
Monday, August 29, 2011
Red Lentil Puree

Since I have been eating less meat these days I am always looking for ways of getting protein into my diet. Lentils are a great protein source but a girl can only eat so much lentil soup. I like this recipe because you can snack on it with pita bread, or use it in a vegie sandwich, use it as a dip with fresh vegies, or use it as part of a meal as a side. I toasted some multi grain bread and spread it with the lentil puree, then topped it with the greek yogurt and cilantro. Seriously, I could live on bread alone!
Ingredients:
1 cup red lentils, rinsed and sorted
1 cup vegetable or chicken broth
1 Tbsp tomatoe paste
5 cloves garlic, chopped
1/2 tsp salt
Pepper to taste
1 Tbsp ground coriander
Greek yogurt
Cilantro
In small stock pot combine lentils, broth, tomato paste, garlic, salt, pepper. Bring to a boil then reduce heat to low and simmer for about 20 minutes, until the lentils are soft and all the liquid has been absorbed. Transfer the mixture to a food processer, add the coriander, and puree until smooth.
Garnish with greek yogurt and fresh chopped cilantro.
This recipe makes 2 cups. One serving is 1/2 cup. Each serving contains 11 grams of fiber and 14 grams of protein.
Cantaloupe Sorbet
It's a hot summer day.......you've been working around the house......you're hot and tired........you finally sit down for a break. Grab this out of your freezer and feel all that tension leave your body. Taste the sweetness of the fruit as it slides down your throat. Oh yes! A little moment of heaven.
Ingredients:
1 large cantaloupe
1/2 cup fresh orange juice
1/2 tsp fresh lemon juice
1 Tbsp honey
Cut the cantaloupe into chucks and put in food processor. Add the honey, orange juice, lemon juice and puree until smooth. Add more honey if you want it sweeter. Chill the puree in the frig for at least one hour. Pour into ice cream maker and freeze according to manufactures directions. Store in plastic container in the freezer.
Sunday, August 14, 2011
Corn Soup
.JPG)
Don't let the simplicity of this soup fool you. It is full of corn flavor. You can kick it up a notch by using the cobs. I give you the info at the end of this post.
Fresh summer corn. I could eat it everyday. It is so sweet, and with a little butter and salt, oh my. So simple and so good. But I digress. Back to the soup.
Ingredients:
1 Tbsp butter
One small onion, diced
2 cups water
4 ears fresh corn
1/2 cup grated potato
Salt
1/2 to 1 cup Milk, or other milk like product
Shuck the corn, remove the silk, and slice off the kernels. Set aside.
In a medium saucepan melt the butter and add the onions. Cook the onions over low heat until soft, but do not brown. Add the grated potato, water, corn and salt and cook 10 minutes or until corn and potato are cooked through. Cool briefly. Puree 2/3 of soup in blender then add back to the pan. You want the soup to be smooth but still have some whole kernels. Heat through on low heat, add some milk to desired consistency, do not allow to boil. Add salt to taste. Serve hot.
The grated potato will help make the soup richer and thicker.
If want more potato in the soup, cut up one potato into small 1/2 inch cubes. Boil in hot salted water in a separate pot. When potatoes are done, drain, then add to soup. Cooking time will be about 10 minutes.
You can also add herbs to this dish; parsley, basil, tarragon, chives, or dill. Take your pick.
I have to say that I like it plain. It's summer in a bowl.
If you want even more flavor, but a little more work, you can kick it up a notch. Take the cobs and put them into 2 cups of water and allow them to simmer away for about 15 minutes. Then remove the cobs and discard and use that water for your soup. There is so much flavor in those cobs, might as well extract as much as possible.
Tomato sandwiches with basil mayo
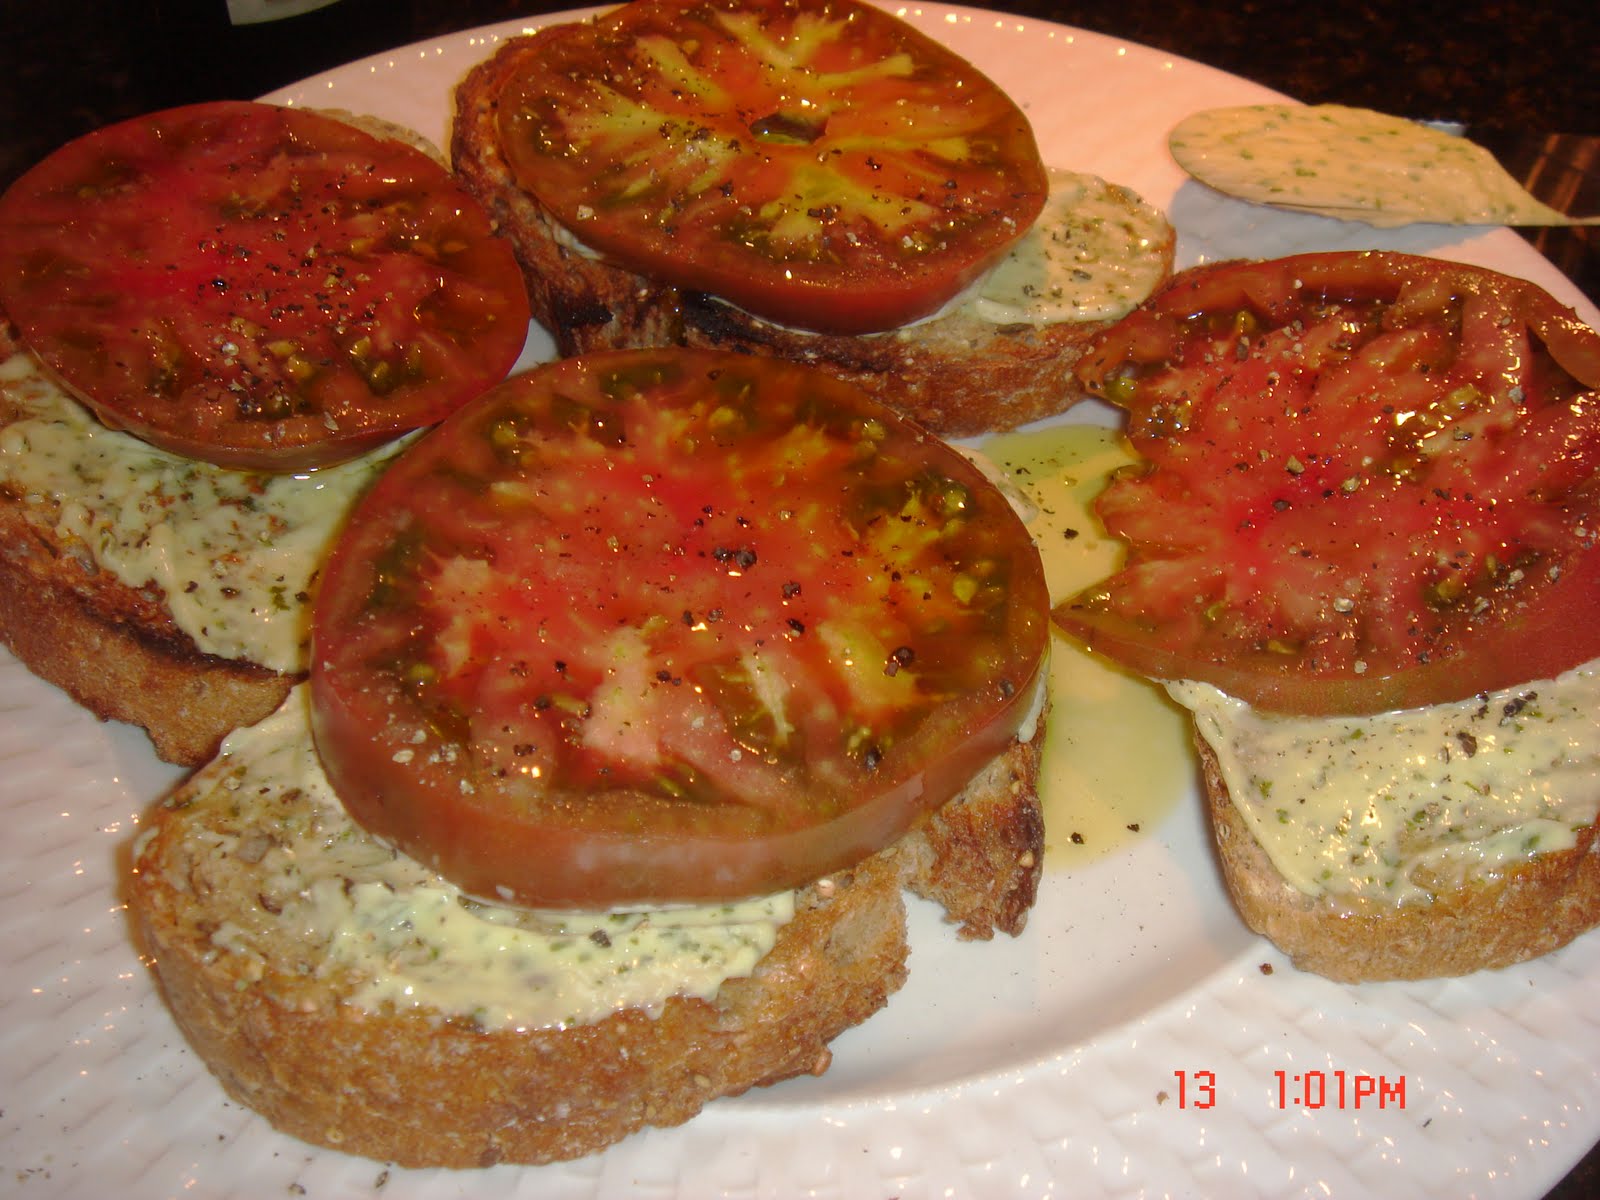
Ingredients:
Multi grain bread, or any good quality bread, slightly toasted
Basil Mayonnaise (see previous recipe on blog)
Sliced heirloom tomato
Very good quality olive oil
Sea Salt
Freshly ground pepper
Toast your bread slightly. Smear with basil mayo. Top with a nice thick slice of heirloom tomato. Drizzle with olive oil, sprinkle with salt and pepper.
Open wide! I hope you get hooked on them just like I did.
Basil Mayonnaise
I can't take credit for this. This recipe is from Ina Garten. That woman has some of the best recipes for basic everyday cooking but with a little twist. I have made many of her recipes and they always work.
I made this basil mayo recently because we are eating grilled vegie sandwiches and I thought they would be so much better than using plain ol' mayo. Oh yeah! The recipe makes 2 cups which is too much for us to eat so I cut it in half. 1 cup is plenty for 2 people and it will last a few weeks in the refrig. Besides sandwiches you can use this as a dip with raw vegies. You could also use it with meat. Use it for anything you use mayo for only kicked up a notch. How about potato salad? Or a tomato sandwich? Yum!
Ingredients:
2 egg yolks, room temperature
3 Tbsp fresh lemon juice
1 tsp minced garlic
1 tsp salt
1/2 tsp pepper
1 cup vegetable oil
1/2 cup olive oil
1/2 cup fresh basil, chopped
In a food processor: add the egg yolks, lemon juice, garlic, salt and pepper. Process until smooth. With the motor running slowly pour the oil into the bowl through the feed tube and process until emulsified. Add the basil and process until finely pureed. Put into a seal container and store in the refrig.
Now that I have spoiled by husband with this he says he never wants to eat regular mayonnaise again!
Tuesday, July 5, 2011
Eggplant Gratin

This gratin is a layered dish, the eggplant and cheese gets layered into a gratin pan and when it cooks the cheese sets up and it gets slightly brown and toasty on top. The original recipe was inspired by Ina Garten.
Ingredients:
1 large eggplant, sliced into 1/2 inch slices
Olive Oil for frying
1/4 cup ricotta
1 large egg
1/4 half and half
1/2 cup Parmesan, freshly grated
1/2 cup Marinara sauce
Salt and pepper
Preheat the oven to 400 degrees.
In a large skillet or grill pan heat some olive oil. Add the eggplant and salt and pepper. Saute the slices of eggplant until brown on both sides and cooked though. Set aside.
In a small bowl combine the ricotta, egg, half and half. Set aside.


In two small gratin dishes place one layer of eggplant, 1/4 of the cheese sauce, 1/4 of the marinara sauce, 1/4 of the Parmesan. It might look messy but it doesn't matter. Repeat. Another layer of eggplant, the cheese sauce, some marinara sauce, then the Parmesan.
Bake for 30 minutes until the sauce has set and the top is brown. Serve hot.
I make two because I like to have one left over. I serve one for dinner with a salad and the other I keep for a couple days later or I wrap it and freeze it. It freezes beautifully and you can take it right from the freezer into the oven to reheat.
I hope my Granddaughter enjoys this recipe! It's sent with love!
Monday, June 13, 2011
Quinoa with black beans

Quinoa is one of those grains that we should all eat. I have tried it several times and I could never acquire a taste for it. Until now. I made this recipe over the weekend, I was really just experimenting, and came up with something that actually tastes good. So besides the fact that it is good for you, it tastes great. Quinoa is high is protein which is why health foodies include this in their regular diet.
Ingredients:
1 cup Quinoa
1 15 oz can black beans
1/4 red onion, diced fine
1 mango, chopped small
handful of cilantro, chopped
1 Lime, zest and juice
2 tbsp Olive oil
Salt and pepper
This is so fast and simple because everything literally gets thrown into a mixing bowl and it is done.
Cook the 1 cup quinoa according to package directions. Allow to cool slightly and put into a large mixing bowl. Drain the black beans, add to the bowl. Dice the red onion to a fine dice and add to the bowl. Peel and cut the mango into a small dice and add to the bowl along with the cilantro. Zest the lime, add to the bowl, cut the lime in half, juice it and add to the bowl. Pour in a couple tablespoons of olive oil, season with salt and pepper and mix well.
This can be eaten straight away but I found that it is better after it has had a bit of time. This is a perfect dish to make the day ahead.
Healthy Eating!
Wednesday, June 8, 2011
Salmon with Miso

I like salmon but I get tired of it cooked the same way all the time so I have to mix it up. Sometimes I make it in white wine with capers which is also nice.
Ingredients:
2 Tbsp white miso
2 Tbsp mirin
1 Tbsp rice vinegar
1 Tbsp liquid amino, or soy sauce
1/2 tsp finely minced ginger
1 tsp sesame oil
2 Salmon fillets, about 6 oz each
Whisk first 6 ingredients together in a bowl. Place salmon in a baking dish, put the miso sauce over them, allow them to marinate for about 30 minutes. Place baking dish with salmon in the oven at 400 degrees for approximately 20 minutes.
Greens: You can use any combination of greens you like. I use spinach alot but I also use beet tops, kale, and chard. You can mix it up or use only one type. When greens are sauteed they cook down to nothing so start with more than you think you need. I use one entire bunch spinach and a small bunch of other green to serve two.
To cook the greens:
Mince 3 cloves of garlic, add to the saute pan with 2 tbsp olive oil. Heat and saute garlic for about 30 seconds, add greens and salt. Toss to cook. Cooking will take only a couple minutes.
Plate the greens in the center, put salmon fillet on top, and sprinkle with black sesame seeds.
Note: I keep my sesame seeds in the freezer so that they stay fresh longer.
Saturday, May 21, 2011
Cantaloupe Soup

This is a simple cold soup that is perfect for a warm summer day.
The other day I ran into the grocery store to pick up something and found myself standing in front of a bin of cantaloupes on sale for 99 cents each. Such a sweet deal but what could I do with them? I mean a girl can only eat so many pieces of cantaloupe. I bought a few and came home to go through my recipes. I then remembered a chilled soup I had made many years ago that was so good and fit the meal, a warm summer night having dinner outside on the balcony with a glass of wine in my hand. Ahhhhhh.
When you make this be sure to make it before you want to serve it because it needs to be chilled until it is very cold.
Ingredients:
1 cantaloupe
zest of 1 orange
juice of 3 oranges
zest and juice of 1 lime
dash or two of cinnamon
mint for garnish
Cut, seed and chop the cantaloupe and put into a vitamix or blendar. Add the zest, juices, cinnamon and puree until very smooth. Chill well. Serve with a sprig of mint.
Option: if you want a soup that is a little more creamy you could add some greek yogurt. I personnally perfer the fruit only option. It's clean and crisp.
Friday, May 6, 2011
Miso Soup

The benefits of fermented foods has been on the radar of health conscious folks for many years now. We are just beginning to understand the benefits of these foods in our overall heath. They can help reduce cholesterol levels in our blood and they strengthen and support our digestive and immune systems. If you would like to read more about these foods check out www.mercola.com. Dr. Mercola has some good information on his web site about this.
With that in mind I have longed to try and get some fermented food into my daily diet. I have found it to be somewhat difficult as some of the items don't sound all that appetizing to me. I have, however, had a fascination with miso and every time I have miso soup or something served with miso I think I need to learn how to make this part of my regular cooking regime. I decided to finally do it and bought some white miso and started messing around with recipes. So far I tried making a salad dressing but it left something to be desired......I still need to work on that one before I share it with you. My favorite so far is the miso glaze I make for roasted salmon. Yum! And all those health benefits. I also tried this miso soup, which is fast and easy so I wanted to share it with you.
This can be an all vegetarian dish with the use of vegetable stock and tofu. The miso and edemame actually contain enough protein that the tofu is not needed but adding it makes the soup a little heartier although this soup is light and so I would serve it as a first course.
Serves 6 to 8
2 Tbsp olive oil
2 leeks, sliced
2 cloves garlic, minced
1 bunch chard, chopped
2 quarts vegetable or chicken stock
2 medium carrots, chopped
4 ounces buckwheat noodles, broken
1 cup edamame
1/2 cup white miso
2 scallions
optional: 1 cup cooked chicken or tofu
Prepare the chard by removing the large stalks then dicing the remainder into large chunks. Set aside.
Heat the olive oil in a large stockpot, add the leeks and garlic and saute for 3 minutes. Add the chard and saute for 5 minutes, then add the stock. Bring to a boil. Add the carrots then reduce the heat to a slow simmer, do not boil, until carrots are tender about 10 minutes.
Meanwhile bring a pot of water to the boil and cook buckwheat noodles according to package directions, about 3 minutes. Break the noodles up so that when you eat them they will stay on the spoon. Drain noodles and run under cool water to stop the cooking process. Add to the stock pot.
Measure the miso into a bowl and take 1 cup of the cooking liquid and add to it. Stir it until it is Incorporated and then pour it all back into the stock pot.
Add the chicken or tofu and cook only to heat through, about 2 minutes. Serve immediately with sliced scallions as garnish.
Saturday, April 2, 2011
Asparagus Soup
When asparagus is in season it's a good time to buy it because it is inexpensive. And we all need inexpensive right now! I try to find as many recipes as I can with seasonal items. I love asparagus and buy it when I can and most times I roast it in the oven with olive oil or I blanch it and then drizzle it with a vinaigrette.
This soup is thick and rich. The potato gives it a smooth creamy consistency. Roasting the vegetables adds another layer of flavor. I would suggest serving a small amount as a first course. A large bowl can serve as a full dinner and I love that it contains lots of fiber.
This soup is thick and rich. The potato gives it a smooth creamy consistency. Roasting the vegetables adds another layer of flavor. I would suggest serving a small amount as a first course. A large bowl can serve as a full dinner and I love that it contains lots of fiber.
Ingredients:
3 pounds asparagus
2 cups yellow onions
4 Tbsp extra virgin olive oil
Kosher Salt
Black Pepper
4 ounces potato (or tofu)
2 cups chicken broth (or vegetable stock)
3 Tbsp toasted pumpkin seeds (or pine nuts)
Preheat the oven to 450 degrees. 3 pounds asparagus
2 cups yellow onions
4 Tbsp extra virgin olive oil
Kosher Salt
Black Pepper
4 ounces potato (or tofu)
2 cups chicken broth (or vegetable stock)
3 Tbsp toasted pumpkin seeds (or pine nuts)
Trim the ends from the asparagus to remove the tough ends. Put on a baking sheet, drizzle with olive oil, then salt and pepper and mix up to coat evenly.
Chop the onion into a large rough chop. Put on a baking sheet, drizzle with olive oil then salt and mix up to coast evenly. Make sure the vegies have plently of room around them so the entire peice gets roasted. Do not crowd them.
Bake both pans 20 to 30 minutes turning one time until onions are caramelized and asparagus is cooked through.
Meanwhile cut potato into small pieces and put in pan of water. Bring to a boil and cook for about 10 minutes or until cooked through and soft. Drain.
In a blender add the onions, asparagus, potato, and chicken stock. You might need to cut the asparagus into smaller peices if you are using a standard blender. I have a Vitamix and I put whole peices in it with no problem. Blend until very smooth. If too thick add more broth. Salt and pepper if needed.
Can be served hot or cold. Serve with toasted pumpkin seeds on top. It is also nice to drizzle a little more olive oil over the top. Pine nuts are also a good choice.
I also discovered that the soup gets better in a day or two. That's a good reason to make it ahead of time, which is perfect if you serve it at a dinner party. Anything you do ahead is helpful in my book.
Friday, February 25, 2011
Apple Galette

Apples and puff pastry. What could be better? Anything made with puff pastry is high on my list. I love this recipe and make it often because it is one thing I can have while watching my sugar intake.
I have made this with both apples and pears and I love them both. For me it usually depends on what I have in the fruit bowl. I always keep puff pastry in the freezer so I can make this whenever I get that really big urge for a dessert.
I have also used different glazes. Most pastry recipes call for apricot jam as the glaze which adds a nice sheen to the finished product. Think outside the box. I used a pear apple butter on one I made with pears and some meyer lemon marmalade on another I made with apples. It changes the flavor ever so slightly.
Recipe:
2 medium gala apples
1 sheet puff pastry
2 Tbsp flour
2 Tbsp vanilla sugar
2 Tbsp butter
1/8 tsp cinnamon
1 tbsp apricot preserves
1 tbsp water
Preheat oven to 400 degrees.
Make sure the puff pastry is thawed. Remove it from the refrig and prepare the apples. Peel the apples, cut in half, and core.
 Slice into very thin slices.
 Roll out the puff pastry. Dust flour on counter lay the pastry on it then put a little flour on the top of the pastry. Roll out slightly and make into an even square shape. Put the pastry on a piece of parchment paper on a sheet pan. Crimp the border.

Start laying the apple slices across the pastry slightly overlapping. You can make it as tight or loose as you want. Once all the apple slices have been placed dust with the sugar, cinnamon and then dot with butter.
(I keep a jar of vanilla sugar in my pantry for recipes like this but you can use plain sugar.)
Bake for 50 minutes or until the pastry is nicely browned.
Heat the jam with the water and use a pastry brush to brush all over the fruit and edges of the pastry dough.
Allow to cool. Cut into 4 peices.
Optional: a nice added touch would be to dust slightly with powdered sugar.
Monday, January 31, 2011
Hold the Salt
Have you noticed the explosion of new salts available now? Every specialty store has them and even some of the supermarkets are carrying a few gourmet brands. It seems they are everywhere. It can be interesting and exciting to study them, where they are from, what unique flavor they lend to food, are they used while cooking or as a finish salt. And the colors; a rainbow of beautiful choices. I've been hooked several times and am now the proud owner of all kinds of salts I never used before. Now the fun begins. How does it change the taste of a dish? This is called playing with your food, and I like it. I love to get all those little jars out and decide which one gets the honor of sitting on my food today.
Beside the flavor, and size of the grains, there are health reasons to be excited about the salt that is now widely available. We often hear bad things about salt and that is because table salt is refined and most people eat processsed food which is loaded with salt. There are 84 trace minerals in salt but 82 of these have been removed from table salt leaving only sodium and chloride. Not good.
Sea salt, however, contains all the trace minerals we all need in our diet. Celtic sea salt nourishes our body with the minerals we need as it contains all 84 trace minerals. Many wellness doctors say that everyone needs 1 tsp of sea salt per day. This salt should be in everyone's pantry. While you are there
do yourself a favor and get rid of that table salt. Your body will thank you.
It is fun to experiment with the different salts. It's surprising how different foods can taste with various salts. I am proud to say that my pantry now contains the following salts: kosher, fine sea salt, course sea salt, pink himalyan, maldon, celtic, fleur de sel, truffle salt, and alderwood smoked salt. Use them all and look forward to finding more varieties in the future.
Sunday, January 9, 2011
Lemon Peel Powder

It is rare that I get to learn something new in the kitchen so when I find something that excites me I have to share it. I had this recipe in my "someday" pile and finally pulled it out to give it a try. (The someday pile is getting bigger and bigger so I think it is time to try some new things!)
Those of you who know me know how much I love lemon so of course this recipe was right up my alley. If you looked in my cookbooks you would be astounded at how many recipes I have for dishes with lemon.
The lemon peel powder is a recipe that fascinates me. To take something like a lemon and turn it in to a powder that will then be on your counter ready to use any time you want is fascinating. Lemon that doesn't have to be fresh yet it is always at the ready. How cool is that? I can't wait to try it and report back to you on all the ways I have used it.
I am sorry to say that I neglected to take any photo's of the process for this but here is the general recipe:
Organic Lemons, 1 or several (I used 3 meyer lemons because they are my fav)
Using a sharp vegetable peeler peel off the peel in ribbons. Try not get any of the white pitch as it is bitter. Arrange the peels on a baking sheet cut side up. Put them in a dry place for 2 days and allow them to dry. As they dry they will curl up.
OR
Preheat your oven to 250 degrees then turn the oven off and place the sheet of lemons in the oven for several hours. This speeds up the process.
Once they are extremely dry they are ready to pulverize. You can do this a couple of ways. You can use a mortar and pestle and some muscle to crush them. That technique seemed like too much work to me. I tried using the food processor and the pieces of lemon just spun around in the machine and no pulverizing action was happening. I then got out my coffee grinder and that worked perfectly. It is a more confined space and they get ground up pretty quickly. Plus I could see what was going on so I could pulse it until I got it all to the powder stage.
Once they are ground up you should end up with a powder. Put it in a spice jar with a lid and keep in a cool dry place. If you don't use it very often you can keep it in the refrig to prolong the life. I have it next to my stove so that when I am cooking I can see it and it will remind me to try it in various dishes. I think there are many dishes you could use it in such as soups, pasta, and vegetables.
I hope you give it a try. If you do and what to share your experience please send me an email.
Subscribe to:
Posts (Atom)