Showing posts with label Misc. Show all posts
Wednesday, July 23, 2014
Green Lentil Hummus
I will admit that this appetizer is not exactly the most attractive looking dish. I mean its green, and there is not much you can do to it to make it attractive. You could add a few springs of cilantro for a garnish , which is even more green :) But it is delicious as well as healthy so its ok in my book.
I try to eat lentils on a regular basis, and I do love them, but the idea of making a healthy dip that I could serve to guests or take to a party is appealing to me. I like to show people that they can eliminate the unhealthy stuff and eat well.
This dip is good on crackers and pita chips, but I would also serve it with veggie crudites, and perhaps spread on a sandwich.
Ingredients:
3 cups veggie broth
1 cup green lentils
1 bay leaf
3 cloves garlic
3 tbsp fresh lemon juice
1/4 cup olive oil
1/4 tsp ground cumin
pinch cayenne pepper
1/4 cup cilantro
pinch sweet paprika
In a saucepan combine the broth, lentils, bay leaf. Bring to a boil, then cover and reduce to very low heat for 45 minutes. Uncover and allow to cool. Discard the bay leaf.
Put the lentils in the food processor. Add the rest of the ingredients and blend until smooth. Chill and serve.
Monday, June 30, 2014
Roasted Tomatoes with Goat Cheese
As I often do, I see a recipe and then later think about it and try to make it based on what I remember. This is one of those. Because of this, I don't have exact measurements. I just get in the kitchen and throw the stuff together and either it works or it doesn't. This one worked. And it worked well. These tomatoes were absolutely delicious!
It's summertime and the first thing I look for are local organic tomatoes. I like the farmers market the best and I can't get enough of them. This recipe is a great way to eat more tomatoes but not in the traditional sense. If you are lucky enough to have a garden full of tomatoes I know you are always looking for ways to use them up. You will love this.
Use large tomatoes. Cut the top off and reserve. Using a spoon, dig out some of the flesh from the tomato. Make just enough space for however much goat cheese you want to put into it.
In a small bowl, mix some goat cheese with some minced garlic, finely chopped basil, salt and pepper, and an egg. Add a bit of olive oil to make a smooth filing. Spoon it into the tomatoes. Put the top back on them, drizzle on some olive oil and a sprinkle of salt.
Roast on a baking sheet in a hot 425 degree oven for about 35 minutes. The cooking time may vary depending on how many you are making. Serve warm.
As you can see from the picture we like to eat outside. A glass of wine, a good meal, outside in nature with my hubby and dog, and I am a happy woman. Enjoy!
Friday, February 28, 2014
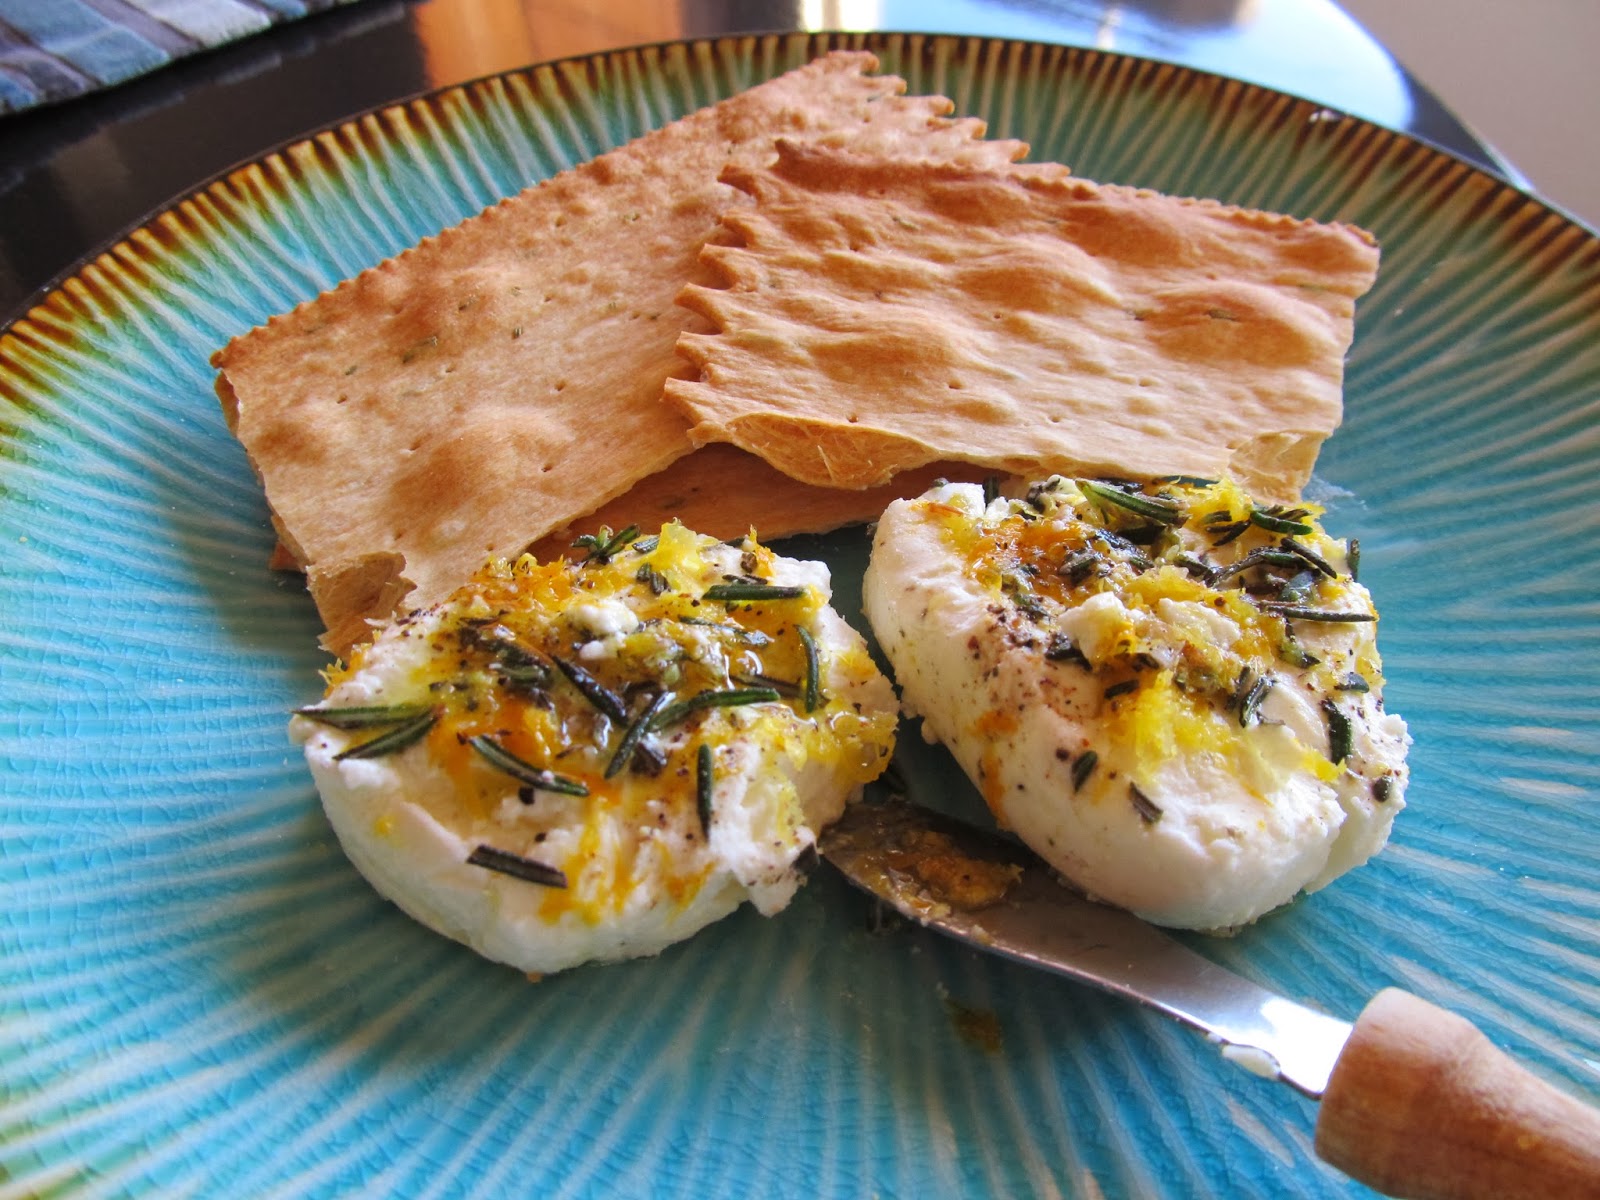
Goat Cheese with Lemon and Rosemary
We were on a picnic in wine country and a friend brought this goat cheese with some crackers for our lunch. The recipe sounds so simple, but man is it good. We couldn't get enough of it, and we were glad when we got have it a few days in a row. As soon as I got home I knew I had to make it.
Ingredients:
1 log of goat cheese
Olive Oil
1 lemon
1 tsp fresh rosemary, minced
Grey salt or other large grain salt like Maldon
Pepper
Make sure the log of goat cheese is well chilled so it is firm. Cut into 1/2 inch rounds. Lay out flat, drizzle with olive oil, sprinkle with lemon zest, sprinkle with rosemary, then grey salt, then freshly ground pepper.
I have some lemon olive oil that is excellent on this. With the lemon olive oil and the lemon zest it is superb!
This can be stored in an air tight container in the refrig for a week.
You can use this to put on bread or crackers, or use it on top of a salad, which is one of my favorite ways to eat it. Plus your guests will be impressed and love it.
Ingredients:
1 log of goat cheese
Olive Oil
1 lemon
1 tsp fresh rosemary, minced
Grey salt or other large grain salt like Maldon
Pepper
Make sure the log of goat cheese is well chilled so it is firm. Cut into 1/2 inch rounds. Lay out flat, drizzle with olive oil, sprinkle with lemon zest, sprinkle with rosemary, then grey salt, then freshly ground pepper.
I have some lemon olive oil that is excellent on this. With the lemon olive oil and the lemon zest it is superb!
This can be stored in an air tight container in the refrig for a week.
You can use this to put on bread or crackers, or use it on top of a salad, which is one of my favorite ways to eat it. Plus your guests will be impressed and love it.
Sunday, March 24, 2013
Homemade Lox
There is a mustard sauce that goes with this at the end of the recipe. You can use it with the lox or use it on everything else. I baked some salmon one night and used it on that. The sauce is fantastic!
Ingredients for lox:
3 pounds fresh wild salmon
1 large bunch of dill
1/2 cup kosher salt
2 tbsp peppercorns
1 tbsp fennel seeds
Cut the salmon in half and place one half in a deep dish, skin side down. Cover with the chopped dill. Combine and salt, sugar, peppercorns, and fennel in a small bowl and stir to combine. Sprinkle over the fish. Place the other half of the fish on top, skin side up. Cover the dish with aluminum foil. Place it in a larger dish then put some weight on top of the fish. I used big 32 oz size cans of tomatoes. Place in the refrigerator for 2 to 3 days, turning every 12 hours. You will need to remove the cans, open the foil, and turn the fish over. Cover back up again, place the weight on, and put it back in the frig until the next turn.
Once it is done curing, remove all the stuff from the fish. Don't wash it because you will lose flavor, simply take a paper towel and wipe it all off until it is clean. Then take a very sharp knife and start slicing thin slices on the diagonal. Cut down until you get to the skin then stop.
You can serve this on pumpernickel bread with the mustard sauce, or use on bagels with cream cheese.
The perfect Sunday morning breakfast!
Ingredients for mustard sauce:
1/4 cup Dijon mustard
1 tsp dry mustard
3 tbsp sugar
2 tbsp tarragon vinegar
1/3 olive oil
3 tbsp fresh dill, chopped
Combine everything but the dill in a small bowl and whisk until it is combined and emulsified. Once it is thick and ready to serve add the dill and stir in.
The original recipe is from Ina Garten.
Tuesday, December 18, 2012
Pumpkin Spice Granola
Around the holidays I love cooking and baking with pumpkin. The health benefits of pumpkin are many: it is rich in antioxidants, vitamins and minerals, and high in fiber.
This granola is a healthy snack to have around, but I like eating it with some Greek yogurt and perhaps some fresh berries. It also makes a nice gift. Put it in clear bag and tie it with some ribbon, or pack it into a nice looking jar.
Ingredients:
3/4 cup pumpkin puree
1/2 brown sugar, packed
2 tbsp coconut oil
1 tbsp vanilla
2 tsp pumpkin pie spice
1 tsp ground cardamom
1 tsp kosher salt
3 cups rolled oats
1 cup pecans, coarsely chopped
1 cup pumpkin seeds
1 cup dried cranberries
Preheat the oven to 325.
In a large bowl add the pumpkin puree, brown sugar, coconut oil, vanilla, spices and salt. Mix well. Add the oats and nuts and toss well to coat every piece. Spread on a parchment lined baking sheet.
Bake for 15 minutes. Remove from oven and using a spatula, toss. Bake another 15 minutes. Remove from the oven and add the cranberries, toss again, then bake another 15 minutes. Total baking time is 45 minutes, in 15 minutes intervals.
Allow to cool in the pan for 30 minutes.
Wednesday, October 24, 2012
My new favorite cookbook - Country Cooking of France
Country Cooking of France by Anne Willan.
I go to the library about every 3 weeks and each time I go I walk through the cookbook section looking for something new or something I have not read before. I picked this book up and brought it home to read having never heard of it. I ended up reading it cover to cover. Over time I've learned that instead of buying books and hoping that I like them, I now check them out of the library first and check them out before buying them and being disappointed.
Books like this are meant to be relished. Every morning while I was having my coffee, I turned pages and read the book. I got lost, in the stories, many about certain recipes, and about the villages where these recipes were born, and about the people. There are also some stories about the great restaurants and chefs of France. It was so enjoyable reading the stories and I consider it an added bonus that you don't normally get with a cookbook. And of course reading all the recipes and the techniques was the interesting part to me and is usually the reason I buy a cookbook.
After reading this book only part way I knew I had to own this book. Books like this are very rare. The recipes are wonderful, the stores an added bonus, and the photos make you feel like you are there. It is beautifully written and so authentic. There are tons of cookbooks on the market and lots of them are not very good. I've tried making recipes from some of these books and they don't turn out. And I am a good cook. I know what I'm doing. That is why, when I find a book like this, I have to own it and add it to my collection, and I feel compelled to share it. I think it is part of the enjoyment to see my friends appreciate the book along with me.
My husband and I will enjoy many great meals from this book, and I get the enjoyment of trying new recipes that I would never otherwise make. I can't wait to get started. There is a recipe for a goat cheese salad I want to make so I already made the marinated goat cheese the other day. In a week or so the cheese will be ready and I can then make the salad. And when I do, you can bet I will share it on my food blog for you to enjoy.
Wednesday, October 17, 2012
Buying a whole salmon
I was out food shopping one day, cruising through the fish department, and ran into an entire whole wild salmon for sale. Hum. I stood there looking at it, comparing it to the filleted salmon right next to it, and the price difference of each item. The whole fish was $3.00 per pound cheaper than the fish that was already filleted. Wouldn't you seriously consider it for that kind of savings? Or is it just me?
I had some experience in filleting a fish many years ago and found out how difficult it was, so I really had to think about this. Yikes, did I really want to get myself into that situation again? In the end I could not pass up the savings and bought the whole fish. I brought it home and begged my husband help me fillet it!
I've gotta tell you it was a little overwhelming. And you have to have to certain amount of strength to cut through it all, and that's where my husband came in. He has the brawn, and I have the technique. Between the both of us, we took turns at the fish. It took a while :) He cracked through the backbone so we could cut it down the center.
Then we had to fillet the fish off the backbone, which is the most difficult part, and you can lose a lot of fish if you are not careful. Then I starting pulling out the bones, and finally we cut it up into serving size pieces.
In the end we ended up with 9 meals from this fish and since it cost me just under $42.00 which averages out to $4.66 per meal, which is $2.33 per serving. For wild salmon! I am thrilled. I can't believe that we get to eat wild salmon for this prices.
I put the servings in zip lock bags and put them in the freezer. Now I simply pull out a bag, put in a bowl of cold water to defrost, and its ready to make for dinner.
There is no way on earth I will ever find that deal again but now I am so happy I decided to tackle it. It just means keeping your eyes open and being open to something that is a little more work than you'd like. With the prices of food these days I am willing to do a little more work to get the savings.
I hope this will inspire you to go out and find a deal and tackle it. Good luck!
Tuesday, March 20, 2012
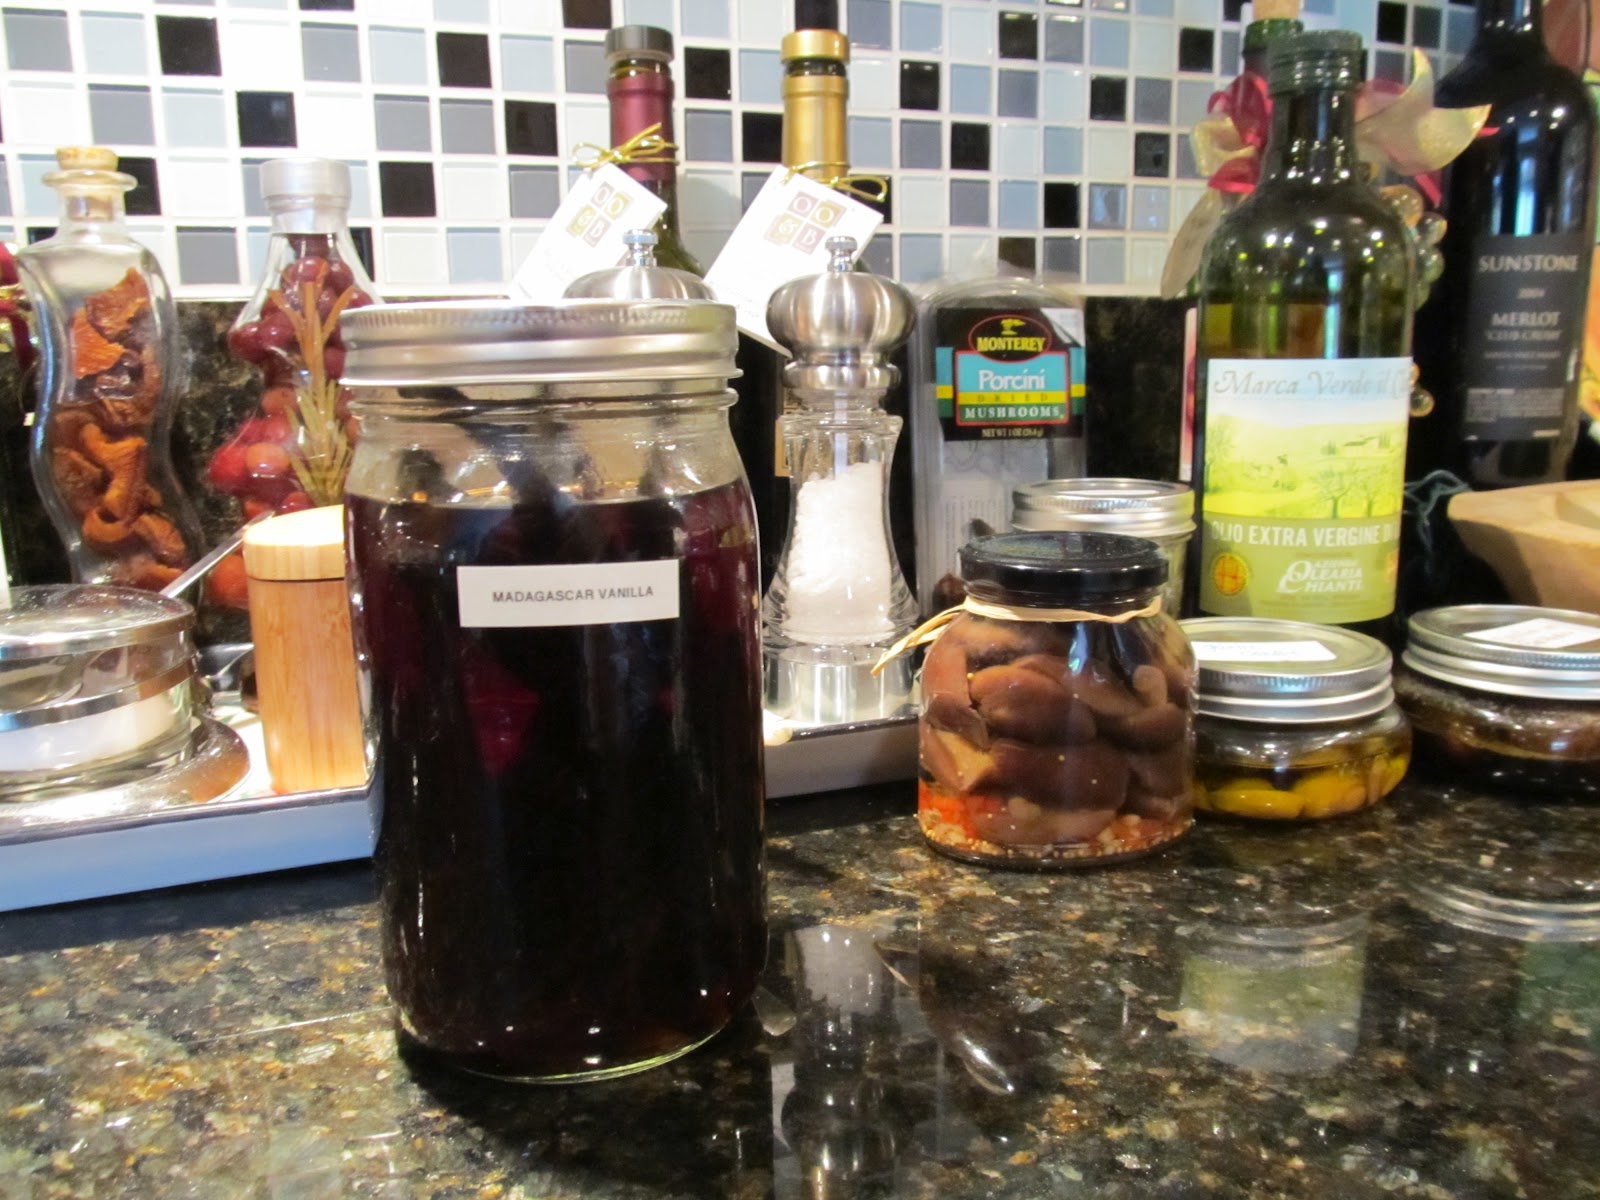
Making Vanilla
How did all this start? I ask myself that question often. I start what I think is a great project, and then a couple months later I am questioning myself.
It all started because I was using vanilla in my morning smoothie. Every day. Each and every day. Do you know how expensive vanilla is? Let me tell you. I shopped for vanilla at every store I could find. I compared prices and read about artificial vs natural. I was shocked to find out that even some of the artificial stuff was expensive. I was like WTH? And the good stuff was well, lets just say I would need to take out a second on my house if I continued down that road. It's one thing to use a good quality vanilla every so often when you bake but to use it everyday? No going to happen. With that in mind another idea is born. Make my own vanilla.
I knew it was easy so off I went to buy vanilla beans. The price of these fluctuates also. I finally found the cheapest ones I could find and then proceeded to buy 12 of them. Yickes! I split them down the center and put them into the jar then filled the jar with vodka.
Oh yeah that reminds me, the question of what vodka to use came up. I didn't really want to use the expensive stuff, but if I decided to buy one that was a little cheaper I had to spend money on that, and then I would have lots left over which we would have to drink. Oh darn! Just kidding. We usually buy premium vodka so I really did not want to have some cheap stuff laying around, so in the end I used the good stuff.
I put the jar in the corner of my kitchen where it is dark and cool. I can't remember how long it was supposed to take before it was vanilla, something like a month. Whatever it was it was too short! I checked the bottle every few weeks and there was no way it was vanilla. It smelled like vodka with vanilla beans. So I finally figured that either this project was a bust or I had just wasted a whole bunch of money only to throw it out. I left it in the corner of my kitchen and completely forgot about it, and went on my merry way without homemade vanilla.
Here we are many months later and it finally looks and smells like vanilla. The moral of this story is if you are in, you gotta go in for the long haul. This is not a quick recipe you can whip up and use right away. But if you are curious, and have the patience, make a bottle, but be prepared to put it up for several months. In the end you will have a big jar of homemade vanilla to use any way you want. Even in your morning smoothie.
It all started because I was using vanilla in my morning smoothie. Every day. Each and every day. Do you know how expensive vanilla is? Let me tell you. I shopped for vanilla at every store I could find. I compared prices and read about artificial vs natural. I was shocked to find out that even some of the artificial stuff was expensive. I was like WTH? And the good stuff was well, lets just say I would need to take out a second on my house if I continued down that road. It's one thing to use a good quality vanilla every so often when you bake but to use it everyday? No going to happen. With that in mind another idea is born. Make my own vanilla.
I knew it was easy so off I went to buy vanilla beans. The price of these fluctuates also. I finally found the cheapest ones I could find and then proceeded to buy 12 of them. Yickes! I split them down the center and put them into the jar then filled the jar with vodka.
Oh yeah that reminds me, the question of what vodka to use came up. I didn't really want to use the expensive stuff, but if I decided to buy one that was a little cheaper I had to spend money on that, and then I would have lots left over which we would have to drink. Oh darn! Just kidding. We usually buy premium vodka so I really did not want to have some cheap stuff laying around, so in the end I used the good stuff.
I put the jar in the corner of my kitchen where it is dark and cool. I can't remember how long it was supposed to take before it was vanilla, something like a month. Whatever it was it was too short! I checked the bottle every few weeks and there was no way it was vanilla. It smelled like vodka with vanilla beans. So I finally figured that either this project was a bust or I had just wasted a whole bunch of money only to throw it out. I left it in the corner of my kitchen and completely forgot about it, and went on my merry way without homemade vanilla.
Here we are many months later and it finally looks and smells like vanilla. The moral of this story is if you are in, you gotta go in for the long haul. This is not a quick recipe you can whip up and use right away. But if you are curious, and have the patience, make a bottle, but be prepared to put it up for several months. In the end you will have a big jar of homemade vanilla to use any way you want. Even in your morning smoothie.
Sunday, August 14, 2011
Basil Mayonnaise
I can't take credit for this. This recipe is from Ina Garten. That woman has some of the best recipes for basic everyday cooking but with a little twist. I have made many of her recipes and they always work.
I made this basil mayo recently because we are eating grilled vegie sandwiches and I thought they would be so much better than using plain ol' mayo. Oh yeah! The recipe makes 2 cups which is too much for us to eat so I cut it in half. 1 cup is plenty for 2 people and it will last a few weeks in the refrig. Besides sandwiches you can use this as a dip with raw vegies. You could also use it with meat. Use it for anything you use mayo for only kicked up a notch. How about potato salad? Or a tomato sandwich? Yum!
Ingredients:
2 egg yolks, room temperature
3 Tbsp fresh lemon juice
1 tsp minced garlic
1 tsp salt
1/2 tsp pepper
1 cup vegetable oil
1/2 cup olive oil
1/2 cup fresh basil, chopped
In a food processor: add the egg yolks, lemon juice, garlic, salt and pepper. Process until smooth. With the motor running slowly pour the oil into the bowl through the feed tube and process until emulsified. Add the basil and process until finely pureed. Put into a seal container and store in the refrig.
Now that I have spoiled by husband with this he says he never wants to eat regular mayonnaise again!
I made this basil mayo recently because we are eating grilled vegie sandwiches and I thought they would be so much better than using plain ol' mayo. Oh yeah! The recipe makes 2 cups which is too much for us to eat so I cut it in half. 1 cup is plenty for 2 people and it will last a few weeks in the refrig. Besides sandwiches you can use this as a dip with raw vegies. You could also use it with meat. Use it for anything you use mayo for only kicked up a notch. How about potato salad? Or a tomato sandwich? Yum!
Ingredients:
2 egg yolks, room temperature
3 Tbsp fresh lemon juice
1 tsp minced garlic
1 tsp salt
1/2 tsp pepper
1 cup vegetable oil
1/2 cup olive oil
1/2 cup fresh basil, chopped
In a food processor: add the egg yolks, lemon juice, garlic, salt and pepper. Process until smooth. With the motor running slowly pour the oil into the bowl through the feed tube and process until emulsified. Add the basil and process until finely pureed. Put into a seal container and store in the refrig.
Now that I have spoiled by husband with this he says he never wants to eat regular mayonnaise again!
Friday, February 25, 2011
Apple Galette
Apples and puff pastry. What could be better? Anything made with puff pastry is high on my list. I love this recipe and make it often because it is one thing I can have while watching my sugar intake.
I have made this with both apples and pears and I love them both. For me it usually depends on what I have in the fruit bowl. I always keep puff pastry in the freezer so I can make this whenever I get that really big urge for a dessert.
I have also used different glazes. Most pastry recipes call for apricot jam as the glaze which adds a nice sheen to the finished product. Think outside the box. I used a pear apple butter on one I made with pears and some meyer lemon marmalade on another I made with apples. It changes the flavor ever so slightly.
Recipe:
2 medium gala apples
1 sheet puff pastry
2 Tbsp flour
2 Tbsp vanilla sugar
2 Tbsp butter
1/8 tsp cinnamon
1 tbsp apricot preserves
1 tbsp water
Preheat oven to 400 degrees.
Make sure the puff pastry is thawed. Remove it from the refrig and prepare the apples. Peel the apples, cut in half, and core.
Roll out the puff pastry. Dust flour on counter lay the pastry on it then put a little flour on the top of the pastry. Roll out slightly and make into an even square shape. Put the pastry on a piece of parchment paper on a sheet pan. Crimp the border.
Start laying the apple slices across the pastry slightly overlapping. You can make it as tight or loose as you want. Once all the apple slices have been placed dust with the sugar, cinnamon and then dot with butter.
(I keep a jar of vanilla sugar in my pantry for recipes like this but you can use plain sugar.)
Bake for 50 minutes or until the pastry is nicely browned.
Heat the jam with the water and use a pastry brush to brush all over the fruit and edges of the pastry dough.
Allow to cool. Cut into 4 peices.
Optional: a nice added touch would be to dust slightly with powdered sugar.
Sunday, January 9, 2011
Lemon Peel Powder
It is rare that I get to learn something new in the kitchen so when I find something that excites me I have to share it. I had this recipe in my "someday" pile and finally pulled it out to give it a try. (The someday pile is getting bigger and bigger so I think it is time to try some new things!)
Those of you who know me know how much I love lemon so of course this recipe was right up my alley. If you looked in my cookbooks you would be astounded at how many recipes I have for dishes with lemon.
The lemon peel powder is a recipe that fascinates me. To take something like a lemon and turn it in to a powder that will then be on your counter ready to use any time you want is fascinating. Lemon that doesn't have to be fresh yet it is always at the ready. How cool is that? I can't wait to try it and report back to you on all the ways I have used it.
I am sorry to say that I neglected to take any photo's of the process for this but here is the general recipe:
Organic Lemons, 1 or several (I used 3 meyer lemons because they are my fav)
Using a sharp vegetable peeler peel off the peel in ribbons. Try not get any of the white pitch as it is bitter. Arrange the peels on a baking sheet cut side up. Put them in a dry place for 2 days and allow them to dry. As they dry they will curl up.
OR
Preheat your oven to 250 degrees then turn the oven off and place the sheet of lemons in the oven for several hours. This speeds up the process.
Once they are extremely dry they are ready to pulverize. You can do this a couple of ways. You can use a mortar and pestle and some muscle to crush them. That technique seemed like too much work to me. I tried using the food processor and the pieces of lemon just spun around in the machine and no pulverizing action was happening. I then got out my coffee grinder and that worked perfectly. It is a more confined space and they get ground up pretty quickly. Plus I could see what was going on so I could pulse it until I got it all to the powder stage.
Once they are ground up you should end up with a powder. Put it in a spice jar with a lid and keep in a cool dry place. If you don't use it very often you can keep it in the refrig to prolong the life. I have it next to my stove so that when I am cooking I can see it and it will remind me to try it in various dishes. I think there are many dishes you could use it in such as soups, pasta, and vegetables.
I hope you give it a try. If you do and what to share your experience please send me an email.
Those of you who know me know how much I love lemon so of course this recipe was right up my alley. If you looked in my cookbooks you would be astounded at how many recipes I have for dishes with lemon.
The lemon peel powder is a recipe that fascinates me. To take something like a lemon and turn it in to a powder that will then be on your counter ready to use any time you want is fascinating. Lemon that doesn't have to be fresh yet it is always at the ready. How cool is that? I can't wait to try it and report back to you on all the ways I have used it.
I am sorry to say that I neglected to take any photo's of the process for this but here is the general recipe:
Organic Lemons, 1 or several (I used 3 meyer lemons because they are my fav)
Using a sharp vegetable peeler peel off the peel in ribbons. Try not get any of the white pitch as it is bitter. Arrange the peels on a baking sheet cut side up. Put them in a dry place for 2 days and allow them to dry. As they dry they will curl up.
OR
Preheat your oven to 250 degrees then turn the oven off and place the sheet of lemons in the oven for several hours. This speeds up the process.
Once they are extremely dry they are ready to pulverize. You can do this a couple of ways. You can use a mortar and pestle and some muscle to crush them. That technique seemed like too much work to me. I tried using the food processor and the pieces of lemon just spun around in the machine and no pulverizing action was happening. I then got out my coffee grinder and that worked perfectly. It is a more confined space and they get ground up pretty quickly. Plus I could see what was going on so I could pulse it until I got it all to the powder stage.
Once they are ground up you should end up with a powder. Put it in a spice jar with a lid and keep in a cool dry place. If you don't use it very often you can keep it in the refrig to prolong the life. I have it next to my stove so that when I am cooking I can see it and it will remind me to try it in various dishes. I think there are many dishes you could use it in such as soups, pasta, and vegetables.
I hope you give it a try. If you do and what to share your experience please send me an email.
Monday, August 31, 2009
Making Ricotta Cheese
Yes I said making ricotta cheese.
I'm on a cheese kick. Gotta do it. It's new, its exciting, and full of surprises. It makes me giddy to think about making my own cheese.
I don't know how I actually got on this kick. It has interested me for some time. I would walk into cheese shops and think about making cheese and how satisfying it must be. But it is so easy drive to a store and buy good cheese that the thought of making it might seem a little stupid. Eventually the bug got the better of me and I just had to give it a try. I bought a home cheese making book and sat down and read it cover to cover which only proved to get me even more excited about the prospect of eating cheese that I would make.
In my very short cheese making career here is what I have learned so far. It's a simple act of taking milk and heating it that produces cheese. Seems simple. It is simple in concept. Au contraire. Cheese making is not easy. It is a complicated chemical process, and one misstep can ruin a batch of cheese. You end up with something else entirely, and sometimes it is hard to tell what it is.
But this cheese making event was a success so lets get to the details.
Ingredients and equipment:
- 1 gallon whole milk
- 4 cups cultured buttermilk
- Salt
- Large heavy bottomed stock pot
- Thermometer
- Butter muslin or cheesecloth
Put the milk in a large heavy pot and heat it slowly until it reaches 180 degrees, stirring occasionally. This will probably take 35 to 40 minutes, but the temperature is the important item here. Once it has reached 180 remove the pot from the heat and let it sit for 30 minutes. This will allow the curbs to form, see below. Do not stir at this point.
Line a colander with a double layer of butter muslin. Pour the curds into the colander carefully and allow to drain for anywhere from 30 minutes to 2 hours. The longer it drains and dryer the cheese will be. You decide. It all depends on how wet or dry you want it.
When the ricotta has drained to your satisfaction transfer it to a bowl, break it up, and stir. Add salt to taste. The cheese can be kept in the refrigerator up to on week but I would recommend using it as soon as possible.
There are number of different ways to serve and enjoy this cheese. You can add a variety of fresh chopped herbs to it then serve it on crackers. You could add some sun dried tomatoes. I like to make crostini, put the goat cheese on top, then top with some of the sun dried tomatoes and olive oil. Or you can make lasagna or add it to an omelet.
One thing is for sure. The taste is so much better than stuff you buy in the containers at the supermarket. Now I know that making cheese is not such a stupid idea.
Friday, April 10, 2009
Burrata Cheese
Have you tried Burrata Cheese yet? It's all the rage. I had heard about it and then learned that Mario Batali serves it in his restaurants, so you know it's gotta be good, and it's still somewhat of a novelty. It is not yet sold in many places although we have a couple of specialty stores locally that carry it.
A friend of mine went on a Burrata hunt and found a manufacturer, these folks are from Italy, that are supposed to make the best cheese and sell it to the specialty stores, where you can happily walk in and buy it for double what it cost at the manufacturer. But us girls will do just about anything for good cheese, so we took a field trip to this place. Just let me say it is not in the best part of town. It's the kind of area you want to get in....then get out! Fast! But we did get the cheese. We bought several container's of the burrata and then decided while we were there we may as well get some mozzarella too. I would have loved to have gotten some ricotta as well but I figured I was already pushing my luck. Needless to say we were eating cheese for days.
The Burrata comes in a big one pound ball. When you cut into it you notice there is a little skin on the outside that keeps it all together. The inside is very soft and creamy. It is similar to mozzarella but much creamier and richer, although it is light, as in airy. The first night I had it I served it as suggested, simply sliced with some good olive oil, salt and pepper. We also tried it with some fantastic fig balsamic I happened to have in the kitchen. It was good, but I found I could not eat that much because it is rich. I would have thought that since it was so light I could eat more of it but nooooooo.
The next night I decided to make a kind of a capresse pasta. See picture above. I whipped up some pasta dough in the morning and let it rest all day so that by the time I was ready for dinner I would not be too tired to make it. Good thinking on my part! I took some grape tomatoes and covered them with olive oil, dried herbs and garlic and roasted them in the oven. Then using the same pan, I added the pasta to it with the burrata, some kalamata olives, fresh basil and tossed it all together. The heat from the tomatoes and pasta melted some of the burrata so it was gooey. I topped it with some good olive oil and Parmesan. Ahhhh...yum!
You could turn this into a quick week night meal by using dried pasta. I do love a good home made pasta but I don't make it on a regular basis. It's more of a special item in our house.
A few days later I was still trying to figure out what to do with the rest of the mozzarella. I mean one can only eat so many capesse salads. I decided to make a lasagna. Plus I still had some pasta dough in the frig. I had no recipe I just got in the kitchen and put one together.
First I made the lasagna noodles with the pasta dough using my Kitchen Aid attachment. I made them slightly thinner than the store bought ones because I like a lighter lasagna. I think sometimes lasagna is just too darn thick and heavy. I remember while in Florence Italy my husband ordered lasagna that was to die for....like nothing we had ever had and have not had since. It was so unbelievably light I could not believe it was lasagna. All those layers, yet still airy, and it did not make you feel like you had a lead weight in your stomach afterward. Anyway I digress. I decided I would do three layers, each twice. A spinach layer, a tomato sauce layer, and the mozzarella cheese layer.
For the spinach I thawed a frozen bag of spinach and got all the water out of it. I caramelized some onions in olive oil, added the spinach, garlic and just a pinch of nutmeg and it was ready. Allow to come to room temp.
For the tomato layer I opened a can of whole San Marzano's and crushed them with my hand, sauteed them with some garlic, oregano, salt and pepper and just a pinch of red pepper flakes.
For the cheese I simply sliced it as thin as I could. I added nothing else to that.
Now I had all the ingredients ready and was ready to assemble. I took one layer of pasta, then half the spinach, more pasta, then half the tomato sauce, pasta, half the cheese. Repeat all three layers. I grated some Parmesan over the top and put it on a baking sheet into a 350 degree oven for 45 minutes. If you like that brown crusty thing on top you con turn the oven to broil for the last 5 minutes.
It was quite tasty and there were leftovers, which I love! I cut them into serving size pieces and put them in the freezer for those nights when I need something quick. I served small portions of the lasagna with a salad and glass of red wine. All I can say is that my husband is one lucky son of a.......I hope he realizes how lucky he is to be married to such a fine cook. Ha!
Subscribe to:
Posts (Atom)