Showing posts with label Appetizer. Show all posts
Wednesday, July 23, 2014
Green Lentil Hummus
I will admit that this appetizer is not exactly the most attractive looking dish. I mean its green, and there is not much you can do to it to make it attractive. You could add a few springs of cilantro for a garnish , which is even more green :) But it is delicious as well as healthy so its ok in my book.
I try to eat lentils on a regular basis, and I do love them, but the idea of making a healthy dip that I could serve to guests or take to a party is appealing to me. I like to show people that they can eliminate the unhealthy stuff and eat well.
This dip is good on crackers and pita chips, but I would also serve it with veggie crudites, and perhaps spread on a sandwich.
Ingredients:
3 cups veggie broth
1 cup green lentils
1 bay leaf
3 cloves garlic
3 tbsp fresh lemon juice
1/4 cup olive oil
1/4 tsp ground cumin
pinch cayenne pepper
1/4 cup cilantro
pinch sweet paprika
In a saucepan combine the broth, lentils, bay leaf. Bring to a boil, then cover and reduce to very low heat for 45 minutes. Uncover and allow to cool. Discard the bay leaf.
Put the lentils in the food processor. Add the rest of the ingredients and blend until smooth. Chill and serve.
Friday, February 28, 2014
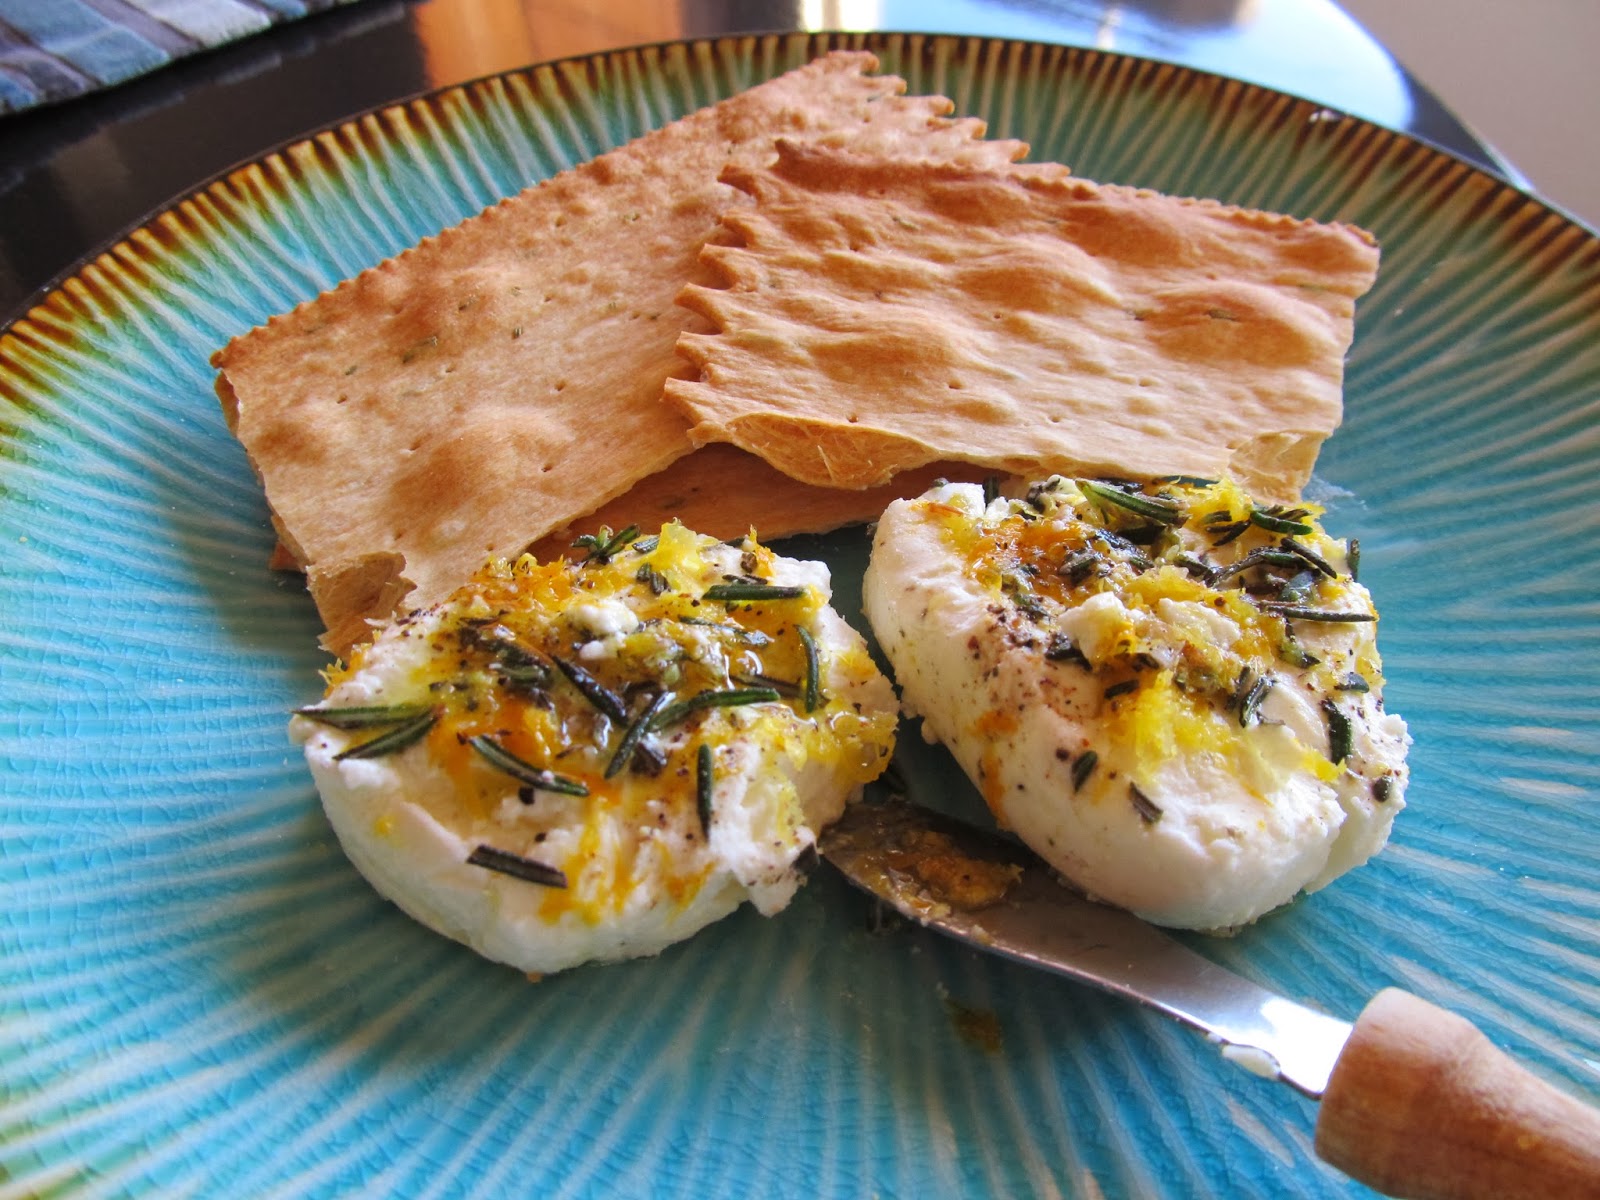
Goat Cheese with Lemon and Rosemary
We were on a picnic in wine country and a friend brought this goat cheese with some crackers for our lunch. The recipe sounds so simple, but man is it good. We couldn't get enough of it, and we were glad when we got have it a few days in a row. As soon as I got home I knew I had to make it.
Ingredients:
1 log of goat cheese
Olive Oil
1 lemon
1 tsp fresh rosemary, minced
Grey salt or other large grain salt like Maldon
Pepper
Make sure the log of goat cheese is well chilled so it is firm. Cut into 1/2 inch rounds. Lay out flat, drizzle with olive oil, sprinkle with lemon zest, sprinkle with rosemary, then grey salt, then freshly ground pepper.
I have some lemon olive oil that is excellent on this. With the lemon olive oil and the lemon zest it is superb!
This can be stored in an air tight container in the refrig for a week.
You can use this to put on bread or crackers, or use it on top of a salad, which is one of my favorite ways to eat it. Plus your guests will be impressed and love it.
Ingredients:
1 log of goat cheese
Olive Oil
1 lemon
1 tsp fresh rosemary, minced
Grey salt or other large grain salt like Maldon
Pepper
Make sure the log of goat cheese is well chilled so it is firm. Cut into 1/2 inch rounds. Lay out flat, drizzle with olive oil, sprinkle with lemon zest, sprinkle with rosemary, then grey salt, then freshly ground pepper.
I have some lemon olive oil that is excellent on this. With the lemon olive oil and the lemon zest it is superb!
This can be stored in an air tight container in the refrig for a week.
You can use this to put on bread or crackers, or use it on top of a salad, which is one of my favorite ways to eat it. Plus your guests will be impressed and love it.
Saturday, November 30, 2013
Stuffed Artichokes
After making these I don't know that I will ever make artichokes any other way again. I loved these. Even if I don't use the same filling, cooking them this way makes it much easier and faster. I usually cook the whole artichoke in a pot of boiling water and it takes forever. Figuring out when they are done is also difficult so I tend to overcook them and then they fall apart. Cooking them this way allows you to tell very easily when they are done.
Ingredients:
Salt
2 large artichokes
1 large lemon
2 tbsp butter
3 tbsp olive oil
3 cloves garlic, minced
2 tbsp anchovy paste
1/2 cup black olives, pitted and coarsely chopped
2 tbsp capers, drained and chopped
1/4 to 1/2 cup freshly grated Parmesan cheese
Bring a large pot of salted water to the boil.
Cut the lemon in half. Cut the artichokes in half lengthwise and using a paring knife remove the chokes. Trim the ends of the leaves with scissors to remove the spikes. Rub the cut sides with lemon. Add the lemon juice and the lemons to the pot of water, add the artichokes. Cover and cook for 15 to 20 minutes until the artichokes are tender. You can test for this by using the tip of the paring knife. Allow to drain completely in a colander.
In a heavy skillet heat the butter and olive oil. Add the garlic and anchovy paste and stir, then add the artichokes face down. Cook for 5 to 6 minutes to get a slight brown on them. Turn over and cook another 4 minutes.
Preheat the broiler.
Arrange artichokes cut side up in the skillet and fill.
To make the filling: in a small bowl mix together the black olives, capers, breadcrumbs and cheese.
Cook under the broiler only a couple minutes to get a nice brown crust on them. Serve immediately.
I make my own breadcrumbs. I always keep good quality multigrain bread in my freezer. I remove a couple of pieces and allow them to defrost. Then I remove the crust, cut them up into small pieces and put them in the food processor and pulse until I get the desired crumb.
Wednesday, September 18, 2013
Marinated Olives
It's nice to have olives on hand for quick entertaining. We make a lot of appetizers in our house and olives are always part of the offering. It's easy to buy olives in the store and then bring them home and make them extra special. I marinade them in a few ingredients and after a few days or even a week they are really wonderful.
Ingredients:
olives and juice
1 large bay leaf
fresh rosemary sprig
2 whole garlic cloves
Orange rind, or lemon
olive oil
Make sure you use a clean sterilized jar to store the olives in.
Into the jar put the bay leaf, rosemary, garlic and the citrus rind. Next fill the jar with olives. Now you can use either the juice the olives came in or olive oil. Fill to the top of the jar to cover the olives.
Allow to sit, refrigerated, for several days. These will keep in the fridge for a few months. I take out only what I am going to serve, then put the jar back in the frig until next time. I remove only the olives and leave the other ingredients in the jar until the jar is empty.
There is another way to make olives special which is extra special. You can put all these ingredients into a small saucepan and heat it just until hot, then put into a serving bowl, allow to cook slightly, and serve warm. They are really good served like that and you don't have to make them ahead of time.
Sunday, June 16, 2013
Simple Shrimp with a Honey Mustard Glaze
This is by far the easiest recipe I have ever posted. I've made this for a picnic and it works out really well. If you need to take a dish to a get together you can put this together in minutes. It's fast! And what's so surprising is that it tastes so darn good. Shhhh.......don't tell anyone how fast it is. Let them think you spent some time putting this together.
You can use a grill to cook these or simply use a grill pan on top of the stove.
Make sure your shrimp are cleaned, peeled and deveined. I leave the tails on to act as a handle to hold.
Ingredients:
1 1/2 pounds large shrimp
3 tbsp Dijon mustard
2 tbsp honey
1/4 cup fresh lemon juice
2 garlic cloves, minced
Combine the mustard, honey, lemon juice and garlic in a small bowl. This will be your glaze. Add the shrimp and toss well to coat. Allow to sit in this for at least 15 minutes then saute or grill for 1 to 2 minutes per side and they are done.
You can eat them right away or you can allow them to cool and them put them into a container with a top and put them in the cooler for the picnic. They will hold well for a couple of hours.
Friday, June 14, 2013
Grilled Asparagus with Mustard
Grilled asparagus is perfect the way it is, but I thought this idea of adding some mustard sounded interesting. It adds a different flavor and makes the vegetable very moist and flavorful. I think it's nice for a change, and I love mine on the mustardy side, its got a little kick. This pares well with some grilled meat.
I also don't like washing a lot of dishes so I try to make it all on one dish. I use a platter so I can mix the dressing then add the asparagus and toss it to coat. I then allow it to sit and marinate until I am ready to cook it. You can cook it on the grill or use a grill pan. You want some high heat so you can cook it quick, and you want those beautiful grill marks.
Ingredients:
1 pound asparagus
2 tbsp mayonnaise
2 tbsp mustard, grainy or Dijon
2 tbsp olive oil
2 tbsp lemon juice
1 garlic clove, mined ( or garlic salt)
Salt
Pepper
I do not even measure when I make this. I just eyeball it. I pour it all on the platter, mix it with a spoon, then put the asparagus on the platter and toss it to coat well.
Allow it to sit for a least 30 minutes, then grill for a few minutes. You can allow it to sit for a little bit afterward and serve it a room temp. This is a good staple for the summer grilling season.
Tuesday, May 7, 2013
Chickpea Flatbread
This was my first time cooking with chickpea flour and I have to say I was pleasantly surprised. I'm always looking for gluten free recipes, and recipes that I can eat similar to bread, since I can't eat bread anymore. This recipe seemed promising so I thought I'd give it a try.
About chickpea flour: It is low in saturated fat, cholesterol and sodium. It is a good source of dietary fiber, magnesium, copper, folate, and manganese. It is also a low glycemic food and therefore I would recommend this product to my diabetic clients.
This recipe makes 6 pieces and you can use a 11 x 7 inch baking dish or a baking sheet pan. Its nice if you cook it up thin so it's not too heavy. I like to top it with tomatoes that I normally make for brushetta, but use your imagination. I also roasted some asparagus one night and put that on top. I've also done a pan of caramelized onions then added that to the pan prior to cooking so it cooks up in the flat bread.
If I serve this as a meal I serve two pieces along with a salad. If I serve them as appetizers for a dinner party I serve one piece per person. If it's cocktails I cut them into much smaller pieces and serve as finger food. You can easily double this recipe and bake it on a baking sheet pan. You would increase the temp to 450 and cook for 35 to 40 minutes.
This takes a little advance planning as it has to sit for at least 2 hours before baking. I prefer to allow it to sit for 6 hours or even overnight. I think it enhances the flavor.
Ingredients:
1 1/2 cups chickpea flour
3 cups warm water
1 tbsp sea salt
Freshly ground black pepper
2 tbsp finely chopped rosemary
1/4 cup olive oil
Pour the water into a large bowl. Slowly whisk in the chickpea flour, salt and pepper. Let stand at room temp for 2 hours.
Preheat the oven to 350 degrees.
Stir in the rosemary and olive oil.
Brush a sheet pan with olive oil then pour the batter into the pan. It should be solid when done and slightly brown.
Bake 40 minutes.
Cut into 6 pieces.
Tomato topping: Cut up two tomatoes into small dice and put into a bowl. Add 2 to 3 cloves of minced garlic, salt and pepper, a tbsp or more or chopped basil, and two tbsp olive oil. Allow to sit for at least 30 minutes for the flavors to develop.
Another topping I would recommend would be grilled veggies.
You could also other items prior to cooking:
caramelized onions
bacon
prosciutto
additional herbs
garlic
cheese, pecorino, Parmesan etc.
greens like escarole
As you can see there are lots of things you can do with this recipe.
Sunday, March 24, 2013
Homemade Lox
There is a mustard sauce that goes with this at the end of the recipe. You can use it with the lox or use it on everything else. I baked some salmon one night and used it on that. The sauce is fantastic!
Ingredients for lox:
3 pounds fresh wild salmon
1 large bunch of dill
1/2 cup kosher salt
2 tbsp peppercorns
1 tbsp fennel seeds
Cut the salmon in half and place one half in a deep dish, skin side down. Cover with the chopped dill. Combine and salt, sugar, peppercorns, and fennel in a small bowl and stir to combine. Sprinkle over the fish. Place the other half of the fish on top, skin side up. Cover the dish with aluminum foil. Place it in a larger dish then put some weight on top of the fish. I used big 32 oz size cans of tomatoes. Place in the refrigerator for 2 to 3 days, turning every 12 hours. You will need to remove the cans, open the foil, and turn the fish over. Cover back up again, place the weight on, and put it back in the frig until the next turn.
Once it is done curing, remove all the stuff from the fish. Don't wash it because you will lose flavor, simply take a paper towel and wipe it all off until it is clean. Then take a very sharp knife and start slicing thin slices on the diagonal. Cut down until you get to the skin then stop.
You can serve this on pumpernickel bread with the mustard sauce, or use on bagels with cream cheese.
The perfect Sunday morning breakfast!
Ingredients for mustard sauce:
1/4 cup Dijon mustard
1 tsp dry mustard
3 tbsp sugar
2 tbsp tarragon vinegar
1/3 olive oil
3 tbsp fresh dill, chopped
Combine everything but the dill in a small bowl and whisk until it is combined and emulsified. Once it is thick and ready to serve add the dill and stir in.
The original recipe is from Ina Garten.
Tuesday, August 14, 2012
Crostini with Ricotta and Cherries
Seriously, I am in love with crostini. You can literally put anything on it and it is good. Beyond good. I've made it for years and I never get tired of it. But this year I thought I might try something new. Crostini with cherries? Sounds kind of odd right? Well, with the addition of the ricotta and lemon zest it all works.
Combine a cup of pitted and halved cherries with 1 tablespoon of honey or agave in a small saucepan just until the honey has melted. Turn it off and allow to sit and macerate for a good 10 to 15 minutes, or longer.
Brush 4 slices of rustic whole grain bread with olive oil and either toast in the oven or put on the grill. Toast until light brown and there is some crunch to the bread.
Mix about 1/2 cup fresh ricotta with the zest of one lemon and about a teaspoon of some very finely diced rosemary. Spread on the toast and top with the cherries.
Hum hum good! A sparkling glass of Proseco anyone?
Friday, July 13, 2012
Sweet and Sticky Grilled Chicken Wings
| a gaggle of wings |
This sauce is sweet and sticky and can also be a little spicy if you want. It's a great sauce to use when grilling chicken. I used chicken wings but I would also suggest using drumsticks. You want to pick this up with your figures to really get in to it. You can serve this as the entree or an appetizer. If serving as an appetizer split them apart, separating the three parts, so you are only dealing with one piece at a time.
The process is that you want to prepare your chicken. Then make the sauce.
Ingredients:
1 /12 cup dry red wine
1 cup brown sugar
1/2 cup low sodium soy sauce or liquid amino
2 tbsp finely grated fresh ginger
2 large garlic cloves, minced
Salt
Chicken of your choice
Combine first 5 ingredients in a medium saucepan. Bring it to a boil and then reduce the heat to a simmer. Do not cover. Reduce until it is the consistency of honey. It will take about 45 minutes. Allow to cool.
Season the chicken with salt. Grill to within a couple minutes of completion, probably 20 to 25 minutes. Brush the chicken with the sauce, turn and brush the other side. Do this a couple times until the chicken is completely covered with the sauce and the heat has started to caramelize it on the surface.
Option: We like a little spice in ours. And I do mean just a little. We don't like it really hot, we just like a suggestion or an under laying note so we added a tablespoon of Sambul to the sauce. One tablespoon is very mild so if you would like a little more heat add more. That way you get that sweet and hot thing going.
Finger licking good!
Serve this with some typical summer BBQ food like potato salad or coleslaw.
Monday, August 29, 2011
Red Lentil Puree
Since I have been eating less meat these days I am always looking for ways of getting protein into my diet. Lentils are a great protein source but a girl can only eat so much lentil soup. I like this recipe because you can snack on it with pita bread, or use it in a vegie sandwich, use it as a dip with fresh vegies, or use it as part of a meal as a side. I toasted some multi grain bread and spread it with the lentil puree, then topped it with the greek yogurt and cilantro. Seriously, I could live on bread alone!
Ingredients:
1 cup red lentils, rinsed and sorted
1 cup vegetable or chicken broth
1 Tbsp tomatoe paste
5 cloves garlic, chopped
1/2 tsp salt
Pepper to taste
1 Tbsp ground coriander
Greek yogurt
Cilantro
In small stock pot combine lentils, broth, tomato paste, garlic, salt, pepper. Bring to a boil then reduce heat to low and simmer for about 20 minutes, until the lentils are soft and all the liquid has been absorbed. Transfer the mixture to a food processer, add the coriander, and puree until smooth.
Garnish with greek yogurt and fresh chopped cilantro.
This recipe makes 2 cups. One serving is 1/2 cup. Each serving contains 11 grams of fiber and 14 grams of protein.
Monday, May 17, 2010
Sardine Crostini
I have wanted to try sardines for many years now, having read several articles about them, and seen many recipes and television shows about how good they are, and how good they are for you. I was somewhat awe struck with the idea and a bit intimidated.
I had this impression however, that they were going be very salty strong little fishes, I guess maybe I was thinking they tasted more like anchovies, which I love, but they are used
sparingly. I managed to purchase a can of sardines at a Spanish market I found last year and the can remained in my pantry until last night. I must have finally been in the mood.....it was a warm spring evening, we were going to open a good bottle of wine, and play cards on the balcony. That always gets my brain working, what we need is good appetizer to go with that. I thought of the can of sardines and enlisted my husband to help. He was all jazzed about trying them.
1 loaf bread, thinly sliced, Ciabatta or baguette style
1 fresh garlic clove
Juice of 1/2 Lemon
Sea Salt
1 jar roasted red peppers, well drained, and cut into bite size pieces
1 tbsp capers
Very good quality olive oil
1/2 half a white onion
Prepare the sardines. Open the sardines and dump the can upside down on to a plate and separate them. They are very delicate so be careful. They were packed only in olive oil, and there was quite a bit of it, so I got rid of a some of it. Then I took half a lemon and gave them a little dressing. We sampled a tiny bit and found that they needed salt. A sprinkling of good quality salt made all the difference.
Slice the white onion in very thin slices.
Drain the peppers and slice into bite size pieces.
Drain the capers.
Brush the bread with olive oil, and bake in oven only until they start to turn slightly brown. Depending on your oven this might take 5 to 10 minutes. (I have also used my toaster oven for this if I am only making a few.) Immediately upon removing the crostini from the oven take the garlic clove and brush over the toasts. The heat will cause the garlic to melt on the bread.
Next top with all your ingredients, the sardines, capers, peppers. Once they are all assembled drizzle very lightly with a little fresh olive oil.
There are lots of strong flavors going on there. I hope you enjoy them!
Tuesday, September 29, 2009
Roasted Red Pepper Crostini
Roasted red pepper crostini.
A nice evening, an appetizer and wine on the patio, ahhhhhhh. Can you feel the gentle breeze in that picture?
The red peppers can be done fresh or a day or two ahead if you are entertaining. In fact, I suggest making them a little ahead of time so that the flavors are fully incorporated. You could make them in the morning for an evening meal.
You will need:
2 tablespoons olive oil
2 red bell peppers
4 anchovy fillets
1 clove garlic minced
salt and pepper
4 slices bread
You will need to determine how much you want to serve and them decide how many peppers you are cooking. For 4 crostini I cook 2 peppers, using 1/2 a pepper for each, and this would serve two. If you are serving four use 4 peppers making 8 crostini, again 2 pieces per person. Simply double the recipe.
Start with the red pepper topping. I prefer to grill the peppers until good and charred. I think the grill gives them more flavor. If you prefer you can put them on the grate of your gas stove and simply turn them until they are charred well. Allow them to sit for a few minutes to cool so you can handle them. Peel off as much of the skin as possible but don't get too picky about it. I don't mind it in the finished product. Then slice them and set aside. Heat a saute pan with a couple tablespoons of olive oil and add the anchovy. Allow to cook slowly until the anchovy melts into the oil. Add the peppers and cook a couple minutes, then add the garlic and cook for one minute more. Turn off heat. Allow them to sit until ready to use. They should be a room temp to eat but if making ahead you can refrigerate and then bring them back to room temp for serving. I have made large batches of these for parties and for several servings over the course of a week and it works very well.
Now when it come to the bread I always use a good quality artisan bread. It makes a difference. I don't use white bread because I want it to have some nutritional value and because I like the mouth feel of a hearty bread. I buy multi grain. Slice the bread, baste it with olive oil, then toast it. You can do this in the oven or on the grill. Once off the heat immediately take a garlic clove and brush the bread which causes the garlic to kind of melt onto the bread. Sprinkle with salt and pepper and top with red pepper.
Tuesday, August 4, 2009
Onions with Balsamic Glaze
Cipolle al Aceto - Onions with Balsamic Glaze
I was at the farmers market last weekend and found these Cipolle onions. I rarely buy them but decided I needed to expand my food world. Sometimes you just need to try something new. You can't eat the same thing week after week. So I bought a bag full and then proceeded to figure out what to do with them.
The recipe:
- 1/4 cup olive oil
- 3 Tablespoons unsalted butter
- 2 pounds onions, cut in half and peeled
- 2 Tablespoons sugar
- 1 cup balsamic vinegar
- 1 cup water
- 1 teaspoon fresh rosemary, chopped
You can use large Spanish onions or red onions and cut them in half. Because I used the small Cipolle I left them whole.
Heat the olive oil in a heavy saute pan, I used my old cast iron skillet, then add the butter and cook until the foam subsides. Add the peeled onions cut side down and saute until light golden brown, 8 to 10 minutes.
Add the sugar, vinegar, water and rosemary and bring to a boil, stirring occasionally. Keep on eye on them so the sauce does not reduce too quickly and burn. Cook the onions, uncovered, until the onion are tender and the liquid has reduced to a glaze. This might take about 20 minutes. If the liquid cooks off too quickly add a little more water. You want the onions to be done all the way through and the liquid to be a glaze consistency but not burn.
You can serve these right away but I like to put them in a jar and refrigerate them for a few days. I think they taste richer and deeper after sitting a few days. If refrigerated take them out and allow to come to room temp before serving.
Tuesday, June 30, 2009
Making Goat Cheese
Goat Cheese.
I have a fascination with cheese. I can spend enormous chucks of time thinking about it. Then I hit a wall and leave it alone for awhile.
I think it all stems from my dream......to own a cheese shop. To work there every day handing out samples of cheese to customers....having my customers get big smiles on their face when they taste something they have never tried before....but they know they want again. I want to chat with them about where the cheese came from, how to serve it, how to use it in a recipe, how to store it. I want them to leave not only with cheese but with a fond memory of our conversation. I want them to remember the place and the people and I want them to come back again for more.
Where do all these cheeses come from? How is it possible to take the same milk and rennet and come up so many different types of cheese? I am fascinated by this. I want to learn everything there is about it.
To that end I have started the only way I know how and that is to make cheese. Really simple cheese. So far I have made ricotta, goat cheese, and mozzarella. They were all three delicious. With the ricotta I made an acorn squash lasagna, with the goat cheese a caramelized onion and goat cheese pizza, and with the mozzarella we sliced it with organic heirloom tomatoes, fresh picked basil directly from the garden, drizzled a little olive oil over the top and hit it with some sea salt and pepper and ate it straight away.
I have spent some time researching this cheese making topic and found that it is much more difficult then one might think.
In my childhood I recall my mother coming home from the supermarket with Velvetta cheese and we would make grilled cheese sandwiches. We had no idea this was not real cheese. And it melts beautifully. Have you read the package on that stuff lately? Yikes!
So on to what this post is about: I decided to be brave and make goat cheese. I love goat cheese. I buy it quite often and love it on salads and for crostini with various toppings. So I put it on my calendar and decided to just do it. (Putting tasks on my calendar somehow tends to make me do it. I know! I know!) I found a recipe that I liked and my first challenge was to find the goats milk. Pasteurization in milk can effect the cheese making success so I wanted to find unpasteurized or raw milk. However, that proved to be more difficult than I thought. Hum....who would have thunk that living in the big city would limit the prospect of getting raw milk? Now if I lived out in the country where I had access to a farm I could go buy some wonderful fresh milk and make some fantastic cheese. Here in Orange County we have Mothers or Whole Foods Markets. There are a couple of dairy's but they carry basically the same thing and none of them carry unpasteurized products. Its a safety thing....which is a whole other topic!
There are a few recipes out there which you can find in cheese making books for by googling the topic. Look in the cookbooks you already own. Some recipes work better than others and lend a slightly different taste. What I am amazed at it that often the same ingredients are used but somehow we end up with different cheese. It is very subtle. A slightly different technique or the difference in time and temperatures all produce a different result. Some folks say making cheese is easy but I don't know if I agree. Some folks say making wine is easy too but I think we all know that is not true.
I found a recipe that I liked and so off to Mothers Market I went to get the milk. I purchased the best quality pasteurized organic goats milk they had. Do NOT buy ultra-pasteurized. That is the key. I had my doubts as to whether the pasteurized would work or not but it did and it was a breeze.

Basically you put stuff in a pot, wait for it to get to a certain temperature, then strain it. The recipe takes two days and most of that time is waiting.
Ingredients:
2 quarts organic goats milk
2 cups buttermilk
1/2 tsp liquid rennet
Salt
This makes about 3/4 pound. You can easily double the recipe for 1 1/2 pounds.
In a large non reactive saucepan or pot combine the goats milk, buttermilk and rennet. Stir just until combined and then do not touch it. Do nothing. Heat over low heat until the temperature reaches 180 degrees F. Be sure to use very low heat so the milk does not burn. Getting the temperature up to this point on low heat does take some time, so just stand there and watch it. But don't leave the area! Watch the temp carefully and once it reaches 180 turn it off immediately.
Transfer the liquid to a non reactive bowl and allow to sit and cool for a few minutes then cover with plastic wrap. Now it sits until the curds and whey separate, overnight, see photo. The next day line a colander with cheese cloth and ladle the curds into the colander. Discard the whey. Fold the cheesecloth over top of curbs and allow to drain overnight. Put the colander inside another bowl to catch any liquid. Refrigerate overnight. You now have goat cheese. Add some salt and give it a taste. I bet it's good!
Thursday, April 2, 2009
Potato pancakes with cavier
This is the continuing story of the caviar my friend Nancy received as a gift. If you refer to the recipe for red potatoes with caviar you will get caught up. Anyway....she had this jar of caviar she needed to use up and, being the good friend that I am, I of course, wanted to help her out. We looked around for an appropriate recipe and ended up making a shredded potato pancake topped with smoked salmon and caviar. Hum...now that I think about it, there seems to be a potato and caviar theme going on here. We finally used up the red caviar although I have no idea what type it was. All I know is that it was beautiful. Don't you agree?
The potatoes are shredded, dried well, and sauteed in clarified butter until crisp on both sides. The nice thing is that the potatoes have to soak in a bowl of water for awhile so you could get them shredded and in the water before your guests arrive and then they would be ready to make appetizers. I personally could eat these as a meal because I love potatoes and with the topping it can be hearty. We cut each pancake into 4 pieces but I suppose you could cut them into 6 for smaller portions.
As for the butter, the recipe calls to make your own, but if you want to skip this step you could buy clarified butter. It's not hard to do it just takes an additional step and the time. I rarely use clarified butter so I made my own.
The recipe: (adapted from Weir cooking in the city)
Ingredients:
- 2 1/4 pounds baking potatoes
- 6 tablespoons unsalted butter
- Salt and pepper
- 1/2 cup creme fraiche or sour cream
- 8 ounces thinly sliced smoked salmon
- 1 ounce caviar
- 1 tablespoon fresh chives, thinly sliced
Peel the potatoes and use a mandoline to cut into julienne strips. Place the potatoes in a large bowl and cover with water. Change the water several times until the water is clear. Let them soak about an hour.
Melt the butter in a saucepan, turn off and let sit for about 15 to 20minutes. Spoon the foam off the top and discard. You want the deep yellow clear butter that remains to cook the pancakes with. It will prevent burning.
Drain the potatoes and dry them. You could use a salad spinner for this but a clean kitchen towel works just as well. Toss the potatoes with salt and pepper.
In a 10 inch skillet melt 2 tablespoons of the butter and get hot. Add one third of the potatoes and press to form a flat pancake. Cook about 8 minutes until golden brown and slightly crisp, then flip. Do this by inverting onto a plate and then sliding back in to the skillet. Be very careful, this step could result in a broken pancake. Continue to cook the second side for another 8 minutes. When done, transfer to a serving dish, or hold in the oven on a sheet pan if making more. (We eat them as they come right out of the skillet.) Repeat the process with the rest of the potatoes making 2 more pancakes.
Cut each pancake into 4 wedges and top each wedge with creme fraiche, a slice of the salmon, a small teaspoon of caviar, and the chives.
Enjoy with a sparkling wine, our fav, or a glass of your favorite white wine.
Sunday, January 25, 2009
New Potatoes with Caviar
My friend Nancy was sent 5 jars of caviar for Christmas. Yes I said 5 jars! (Her sister is very generous.) Imagine how disappointed I was when she asked me to cook with her so we could eat the caviar. Oh yea baaabeee! We made these new potatoes topped with caviar and ate them with a bottle of Frank Family champagne. One word. Fantastic!
I look for the smallest new potatoes I can find but if they are larger just cut them in half. Cover the bottom of a pan with them and then add a bottle of inexpensive champagne or sparkling wine. Add some lemon peel and fennel seed. Boil the potatoes until just tender using a paring knife to gently check them being careful not to break the potato. Remove them from the liquid, plate and allow to cool. Use a melon balleror a small knife to create a little hole in the top. Add a dollop of creme fraiche and some caviar. Be sure not to use metal when touching the caviar. If you don't have the traditional mother of pearl caviar spoon, use plastic.
I can't wait to see what we do with the other 4 jars of caviar!
Subscribe to:
Posts (Atom)